094: Silent Hill f Part 2, or Four More Endings
You may be surprised to see a Silent Hill post from me when it’s not Halloween, but I mentioned in my Silent Hill f Part 1 post that I would be back soon to conclude Hinako’s story. See, on your first playthrough of Silent Hill f, you only have access to the standard ending. Since this is a Silent Hill game there are multiple endings… five in all. Playing through on New Game+ (and New Game++) from your clear data file, you get access to the other endings, which add layers to the abrupt, jarring ending you get at first. I enjoyed the unfolding story so much that I decided to play through to get all the endings in short succession and they’re all described in this post.
Warning. (Credit: NeoBards Entertainment, Konami)
I already covered the gameplay mechanics and the main portion of the story in the first post, so I would advise you to start there. This post will concern itself with New Game+, New Game++, the other four endings, and the additional plot details we uncover. After I cover my experiences playing through the different endings and game difficulties, I’ll go over how the new information impacts the story as a whole.
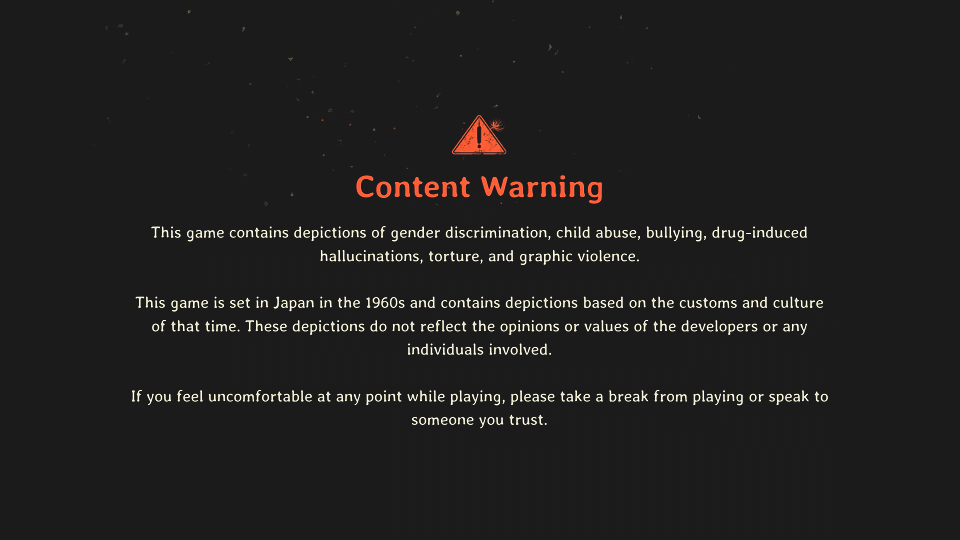
I will also start with the usual content warning. This game contains references to child abuse, gender discrimination, bullying, mental disorders, drug abuse, torture, and murder. Some of the screenshots below may be upsetting.
Spoilers (Credit: NeoBards Entertainment, Konami)
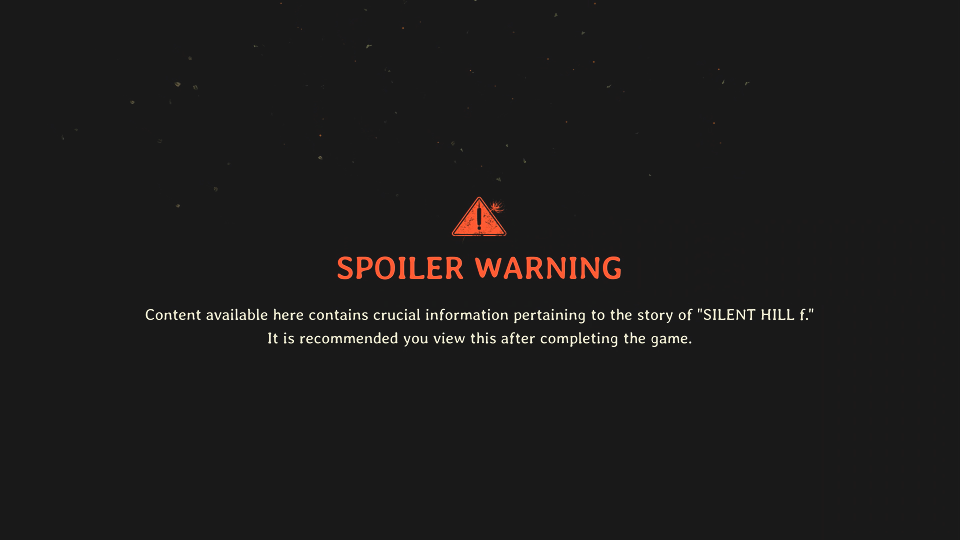
Many spoilers for the additional endings and overall plot of this game follow. Please use caution when deciding whether or not to read this post.
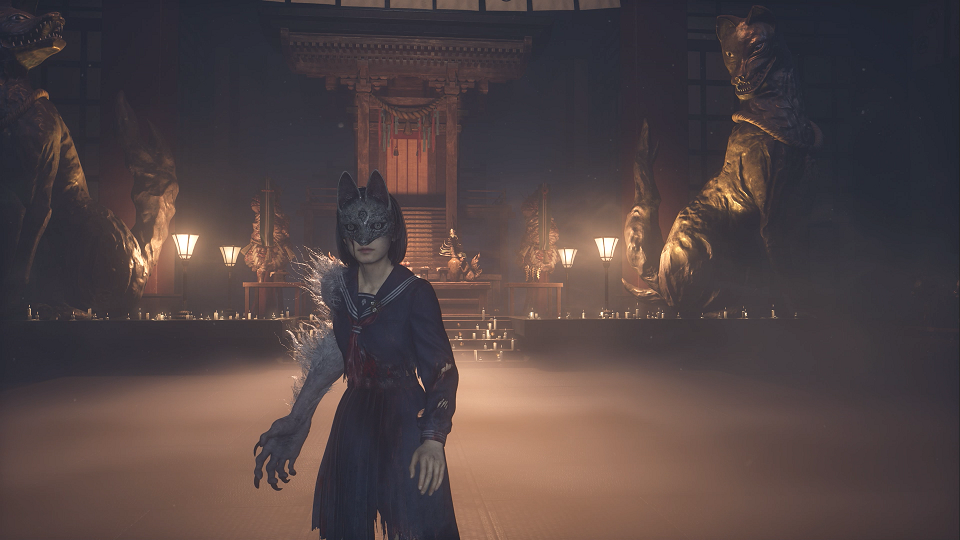
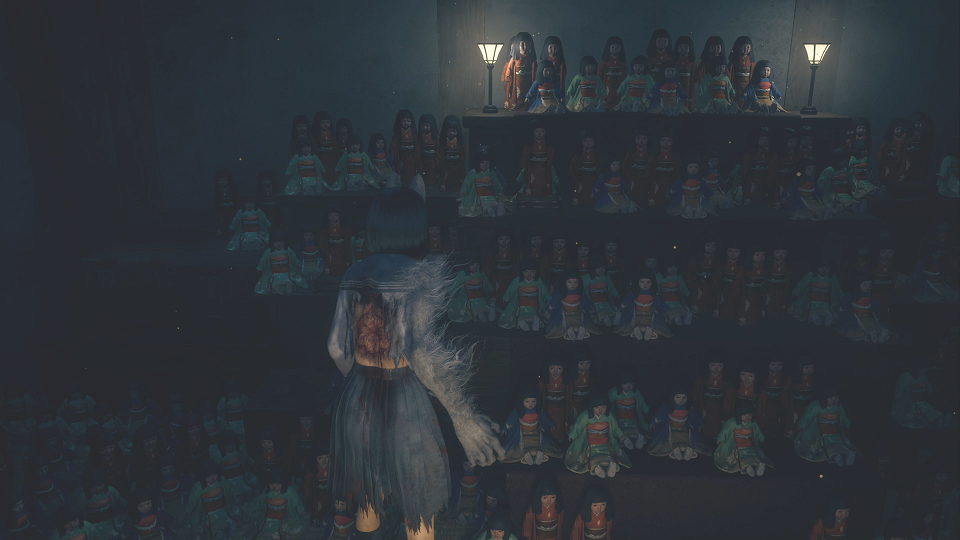
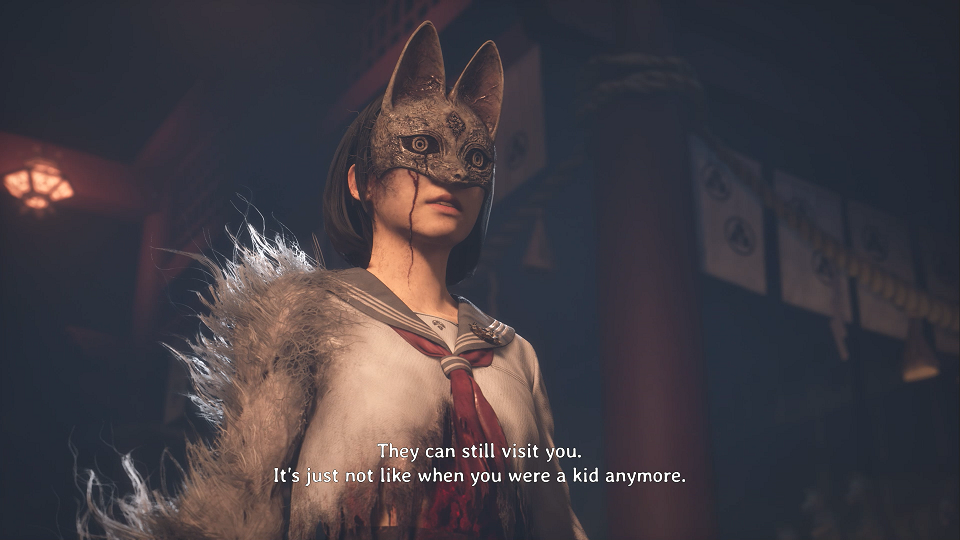
Fox girl! (Credit: NeoBards Entertainment, Konami)
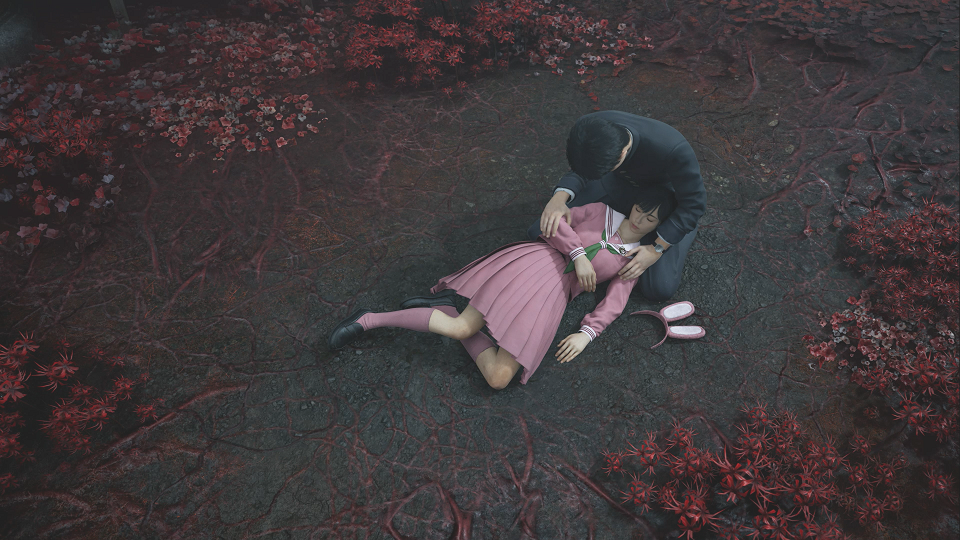
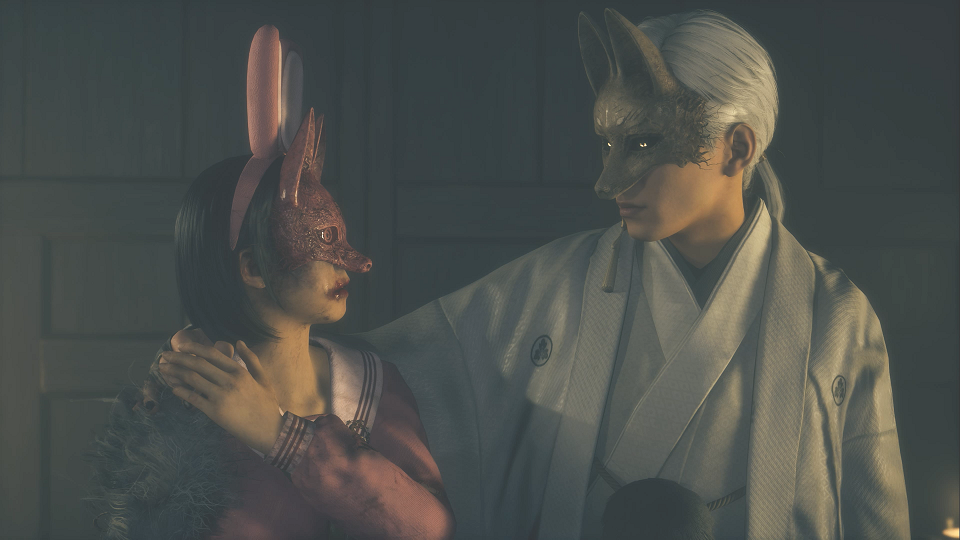
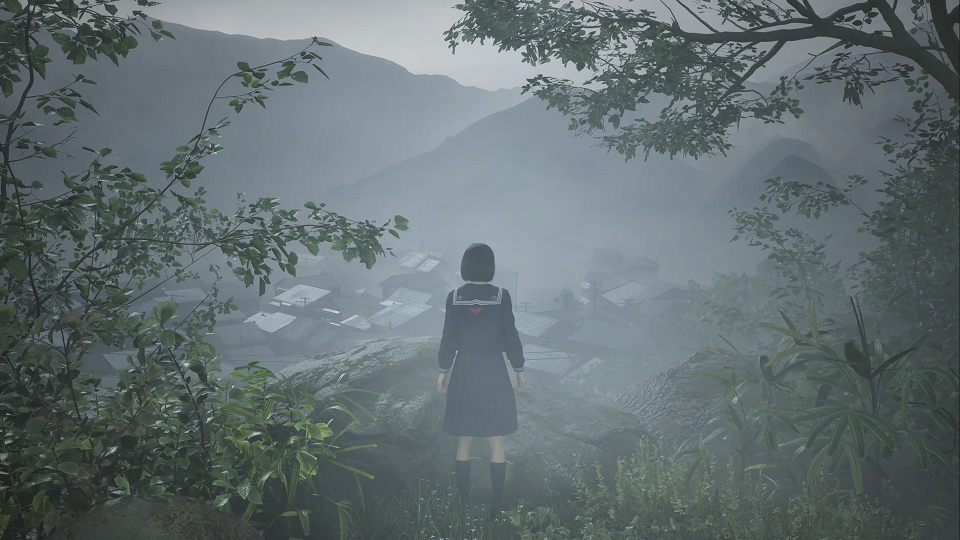
If you recall last time, the game ended with a twist. This twist was foreshadowed throughout the game, but it could be hard to catch if you weren’t paying close attention to the documents, the journal entries, and hints in the dialogue. The teenage Hinako you play as throughout the game was actually a young adult Hinako travelling through a drug-addled hallucination on her wedding day. She was coerced into an arranged marriage in order to pay off her father’s debts. The pills her friend Shu had given her for her migraines were actually addictive and causing an emotional, mental, and spiritual break within Hinako. The gruesome rituals in the game that transformed her into a fox/girl hybrid were part of her real-life wedding during which she snapped, killed an unknown number of people, and fled the scene.
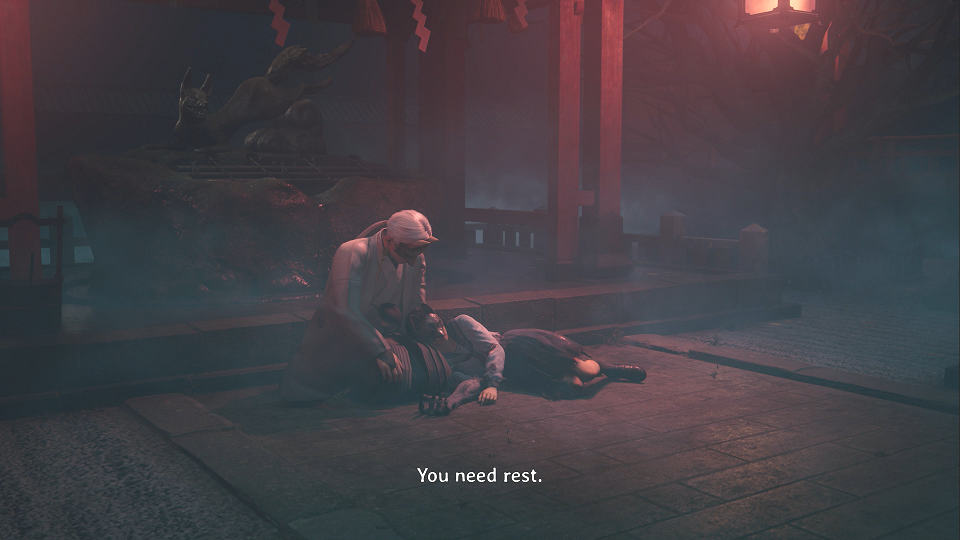
Aww, she sleepy. (Credit: NeoBards Entertainment, Konami)
Since this is Silent Hill, of course more is going on. Silent Hill games often use metaphors and symbolism to show their character’s state of mind. There are always layers. Things are going on in the regular world (Fog World) and in the twisted dark mirror of Silent Hill (Otherworld in the previous games, Dark Shrine in this one). So just how much of the events of the game actually happened and how much was in Hinako’s head is up to interpretation. Also, some endings in Silent Hill can be taken as alternate possibilities, not the actual outcome… just one of many.
We know that there is more to Hinako’s story… the version of her in the Dark Shrine that went through the painful transformation was able to come face to face with the Hinako in Fog World, and she showed that she was aware she had two Hinakos inside her. There were references to her being dead in dialogue from her friend Rinko. Her friend Sakuko constantly referred to her as a traitor. Her platonic guy friend Shu brought up a difficult choice she had to make. (The marriage?) The ghostly and bird-masked specter of her sister Junko appeared a few times telling her that she had to leave her childhood behind and “kill it”… whatever that may be. Near the end of the game, we got clues about a boy name Kotoyuki she had befriended as a child who moved away and belonged to the noble Tsuneki clan. The town is guarded by an easily-angered fox deity that occasionally spirits away girls for Fox Weddings to be his consorts. And throughout Hinako’s journeys in the Dark Shrine she’s guided by a charming if overbearing fox-masked gentleman who her childhood doll warns her not to trust.
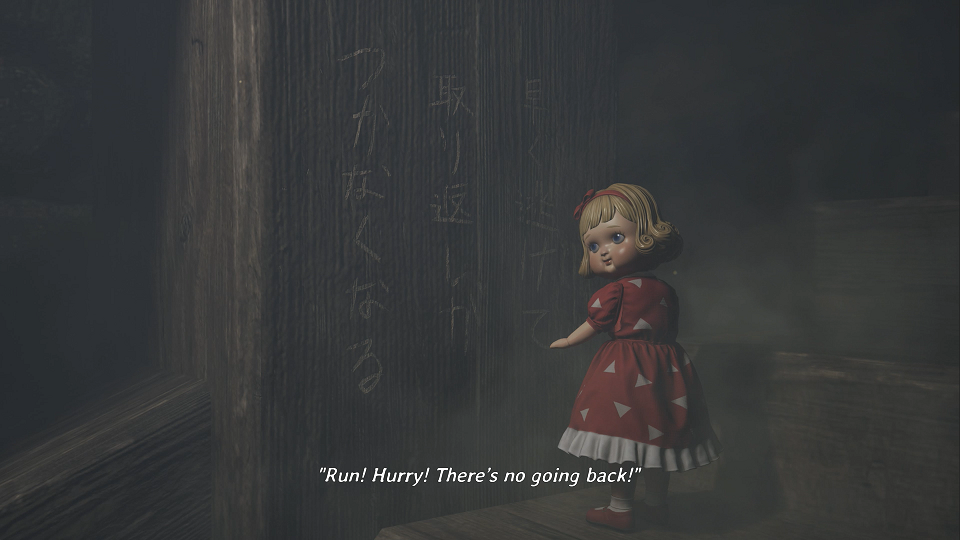
This doll honestly isn’t that helpful. (Credit: NeoBards Entertainment, Konami)
How do all these plot points fit together? The first ending gave us more questions than answers, taking a sharp twist and re-contextualizing the entire story thus far. We can only hope the subsequent endings will give us enough clues to at least form a solid theory on what’s going on here.
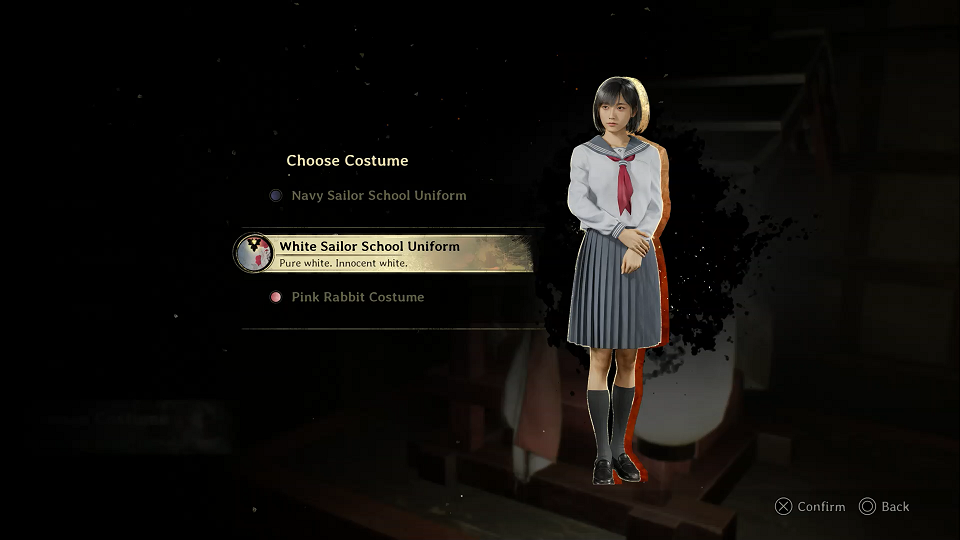
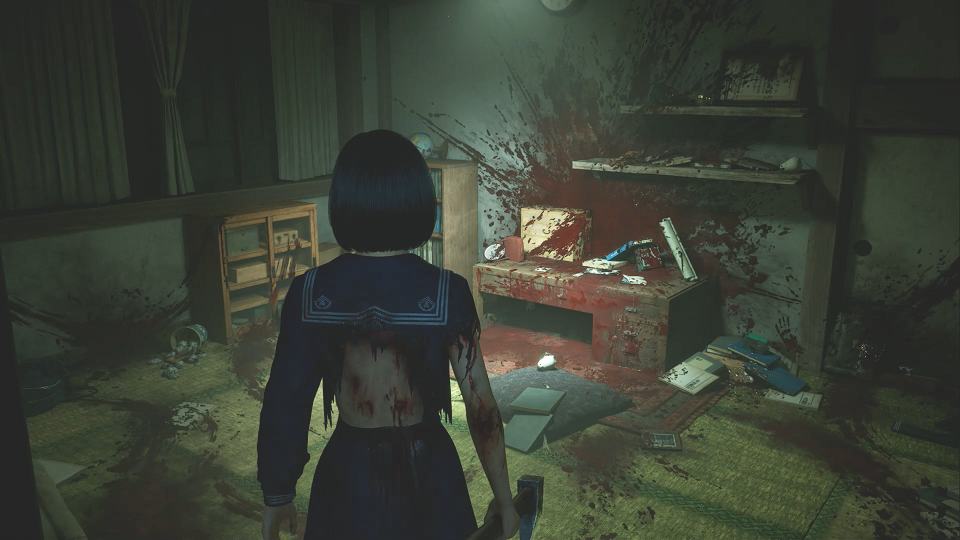
I’m sure this uniform will stay white. (Credit: NeoBards Entertainment, Konami)
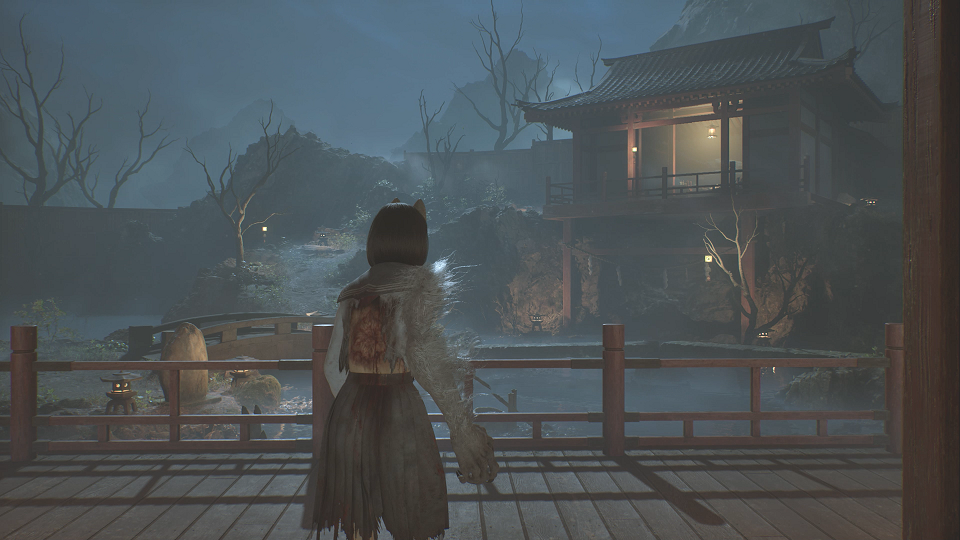
As I mentioned last time, on my first playthrough I wore the standard navy-colored uniform and used the default difficulty settings of Action: Story and Puzzle: Hard. Since there are trophies available for all six difficulty settings, on my second playthrough I selected Action: Hard and Puzzle: Story. The combat was more difficult, the enemies more plentiful and tougher, and the pickups more sparing. The puzzles had different solutions. I also wore the white uniform I unlocked as a perk for preordering the game.
Let’s goooo! (Credit: NeoBards Entertainment, Konami)
New Game+ changes several things about the gameplay experience. Many things carry over, such as the Omamoris, collected Faith, and upgrades. The journal entries and non-puzzle documents you have found remain. The maps reset and you lose your items and weapons. New documents are scattered throughout the game and some of the cutscenes are different. The fox upgrades are granted much sooner in the game. Also, you start the game with Fox Mask’s Brooch, which you can see in the cutscenes. This allows you to enter doors that have Inari-sama’s symbol on them.
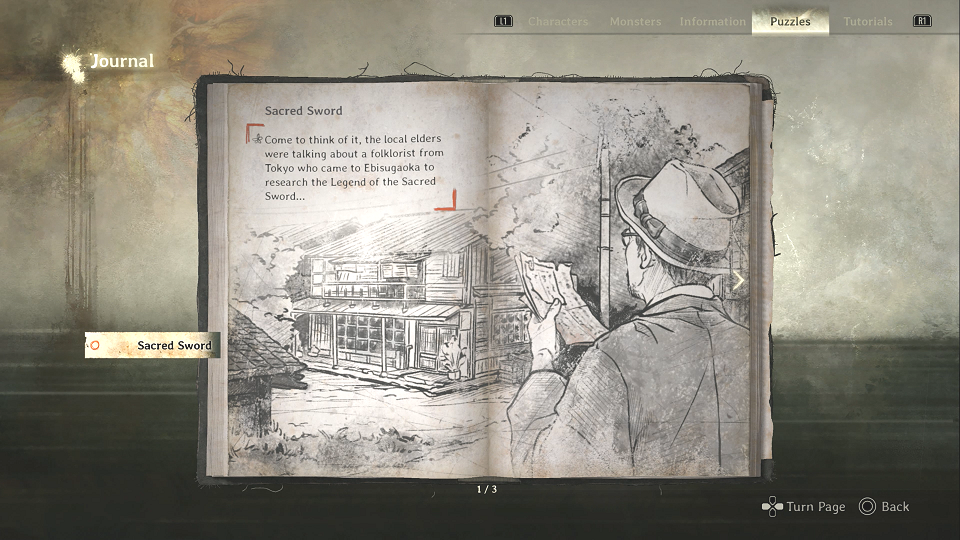
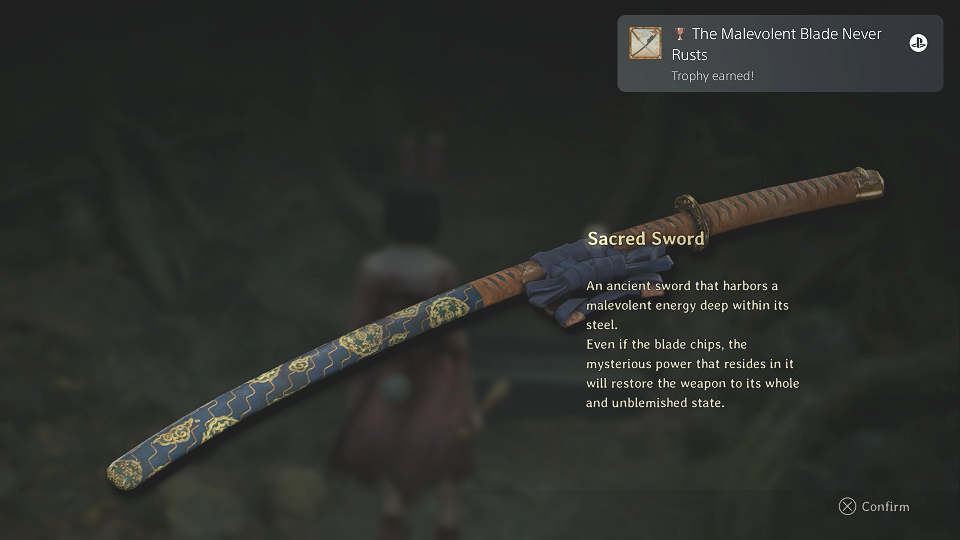
The divine tree and the treasure you learn about in the first playthrough relate to the Sacred Sword side quest in New Game+. I skipped that in my second playthrough because it was not necessary for the ending, but I did find a few clues and artifacts that relate to that quest. (More on that in the fourth playthrough.)
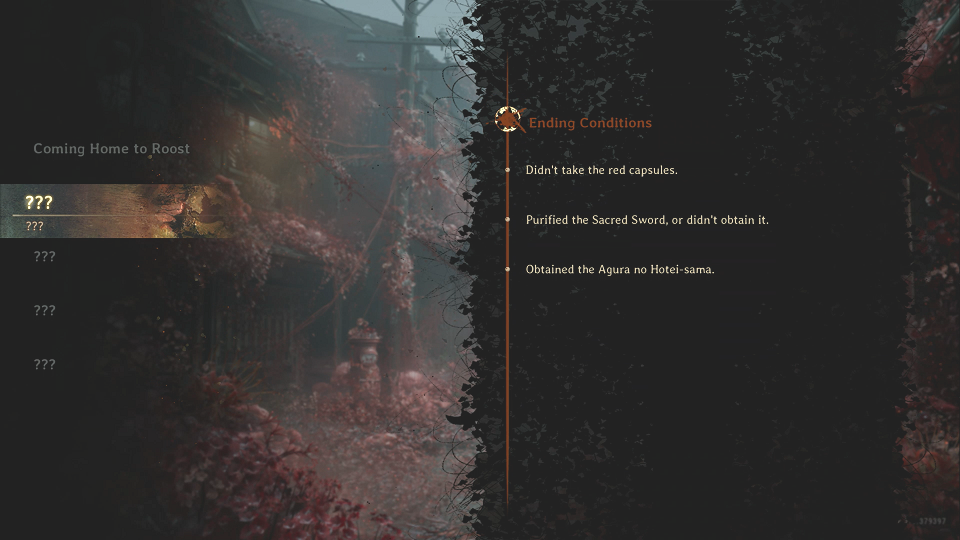
For the second ending the clues the game gave me was to not take the red capsules, either purify the Sacred Sword or don’t pick it up at all, and pick up an item called the Agura no Hotei-sama.
Eww. Goopy. (Credit: NeoBards Entertainment, Konami)
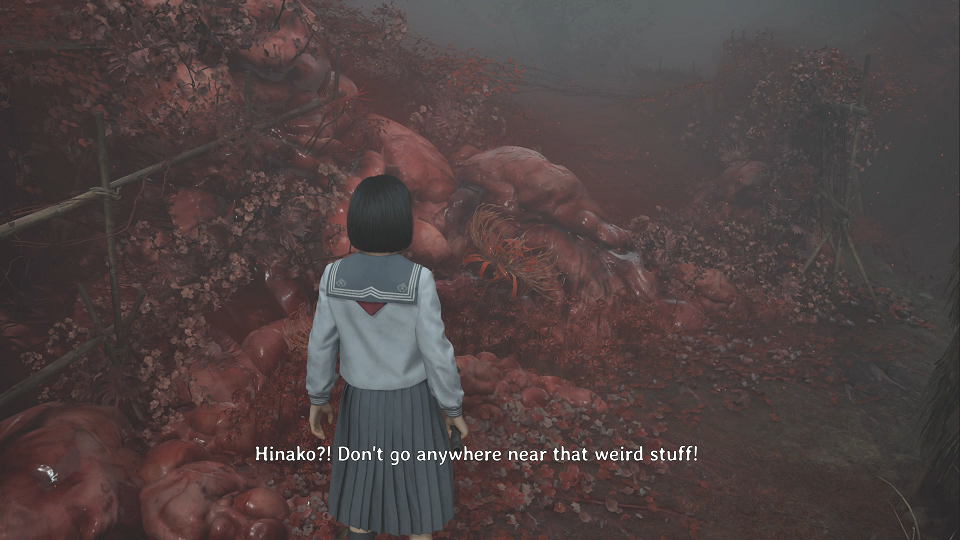
The changes to the story started right away with young Hinako’s conversation with her doll. Instead of talking about being shunned by the other girls, Hinako talks about not wanting to get married. The argument with her parents that kicks off the whole thing turns out to be about the arranged marriage we learned about late in the game. There were several new documents in the beginning relating to a geyser in town and “fox weddings” where girls are spirited away and never seen again.
I only died once in the first fog monster chase, because I got turned around in the alleyways. Right after this fight was my first mistake… I misunderstood the ending requirements, thinking that it meant I wasn’t allowed to pick up the red capsules, so I took one to heal when the game prompts you to do so. It gave me pause, so I looked it up and found that I’m not allowed to even take the ones Shu gives you in the beginning. Luckily I was able to reload my auto save to right after the chase and I was good. I unequipped the red capsules from my item wheel and never took another one.
Also, the fight outside the general store against the three dolls took me several tries due to being on hard mode and having less heal items. Hard mode is no joke. I think I was only able to survive due to keeping the upgrades I made in my first playthrough. I started this second one with max health and nearly max stamina. I maxed stamina during my run, but neglected Sanity since I never use focus attack.
Whoa. (Credit: NeoBards Entertainment, Konami)
The first visit to the Dark Shrine wasn’t too difficult, although I made sure to evade the blind monster. This is the first example of the puzzles being different due to difficulty. Where the Hard mode had you match symbols on the offerings, Story mode had you match the design of the ties on them. It wasn’t any easier, just different.
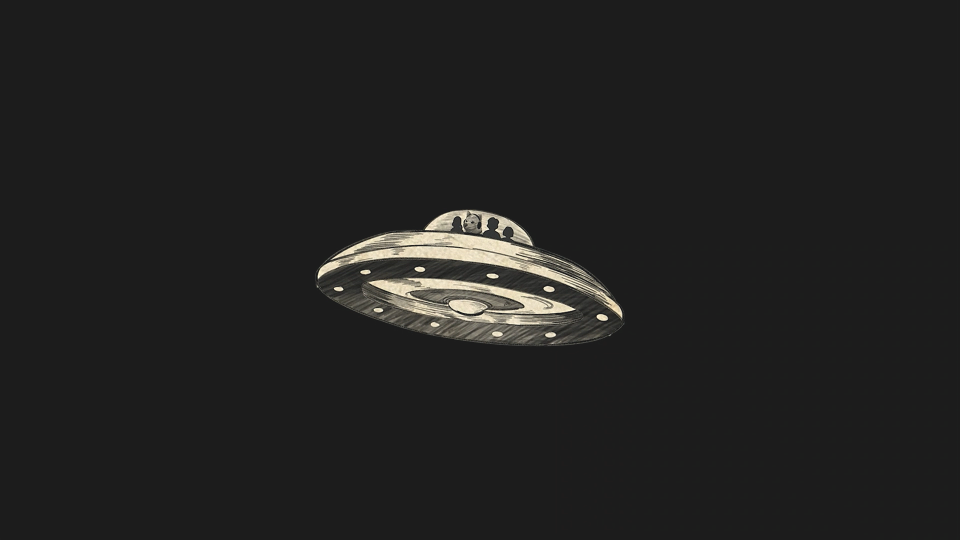
Back in town, new documents talk about being possessed by a fox. They state it’s not always a bad thing, as it can give premonitions or lead to good fortune. In a cool, creepy moment that I wish I had gotten a screenshot of, visiting Sakuko’s family shrine gave you a glimpse of the upcoming Shrine Maiden boss through the front door. As another hint of future tidings, I located one of the Space Wars posters on the way to the scarecrow field. I was certain that poster had to do with the UFO ending. Worried that I might accidentally trigger it (I didn’t know the requirements at that time) I avoided the next poster I found.
The well puzzle where you have to evade the hulking flower monster was way more difficult in Hard mode because he’s much faster and they throw a doll monster into the mix too. I died several times before I managed to kill the doll and get the key. The scarecrow puzzle wasn’t any easier on puzzle Story mode, it just had different clues.
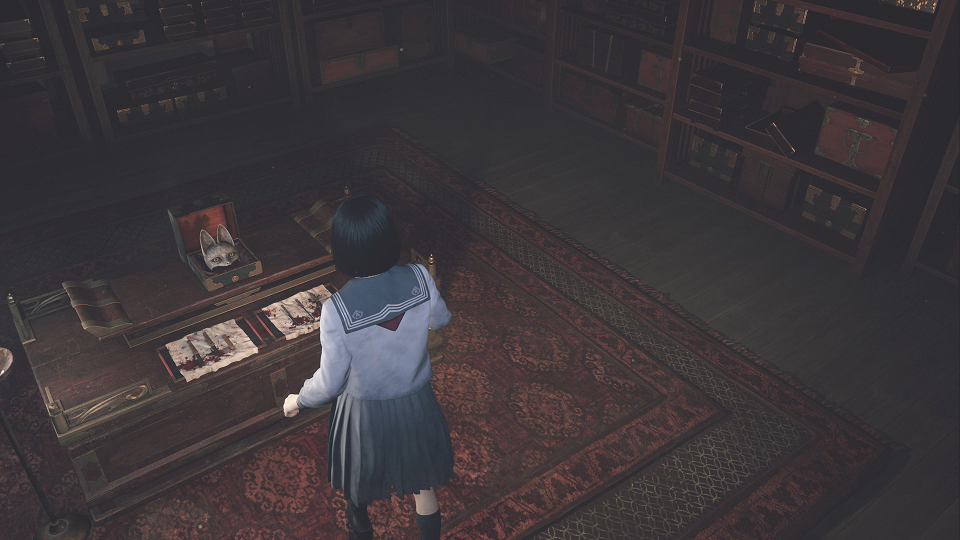
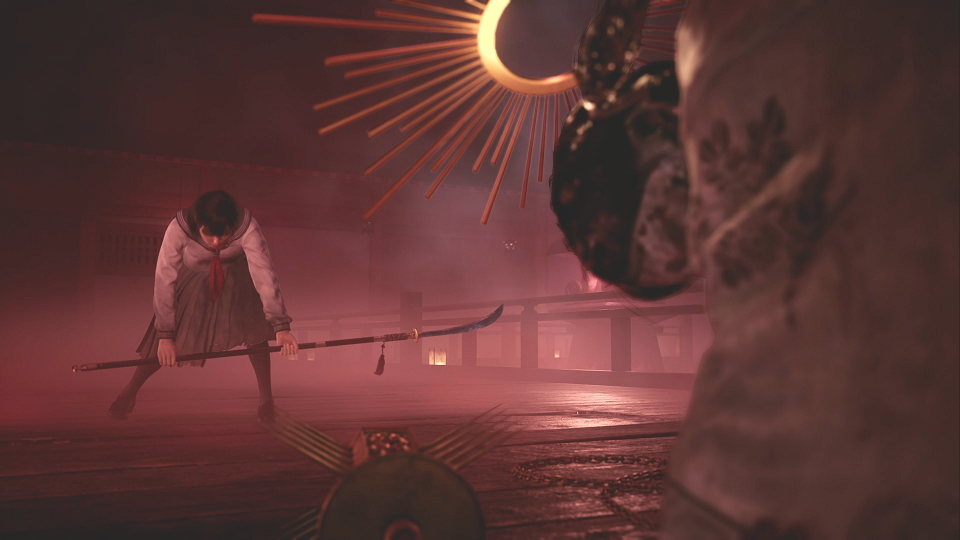
In the second Dark Shrine visit, I found a newly accessible door (due to the brooch) where the last inventory upgrade hid, along with the fox mask Hinako would soon wear. (That’s the above screenshot.) There were also documents relating to mortals marrying deities. In one interesting document, it talked about replacing a sacrifice’s blood with wine and rice, setting the body afloat on the water so the wine would spread across the water and the body would sink. This made me think of the brief announcement trailer that involved Hinako floating on a boat. (This scene never occurs in the actual game, which is odd.)
This is also where I started experimenting with my Omamoris. On my first playthrough I mainly left on the Omamori that upgrade health and stamina, swapping out my third one as needed. On my second playthrough, I was able to upgrade to four slots. I wore the Omamori that increases all three stats and played around with different combinations as the situations warranted. (Clam to decrease enemy sights when trying to evade, Horse to make the chases go easier.)
Hugs. (Credit: NeoBards Entertainment, Konami)
The battle against Sakuko is much more challenging in Hard mode. It took a lot of practice and patience, only striking at just the right moments.
No more hugs. (Credit: NeoBards Entertainment, Konami)
It took me many, many tries and a lot of practice to persevere. I also used the Suzuran Omamori that increases your perfect dodge chance.
Surprise twist. (Credit: NeoBards Entertainment, Konami)
After beating Sakuko, you get rapid-fire flashes of her upcoming rituals. This was a new scene, but I didn’t think much of it at the time.
Is bun. (Credit: NeoBards Entertainment, Konami)
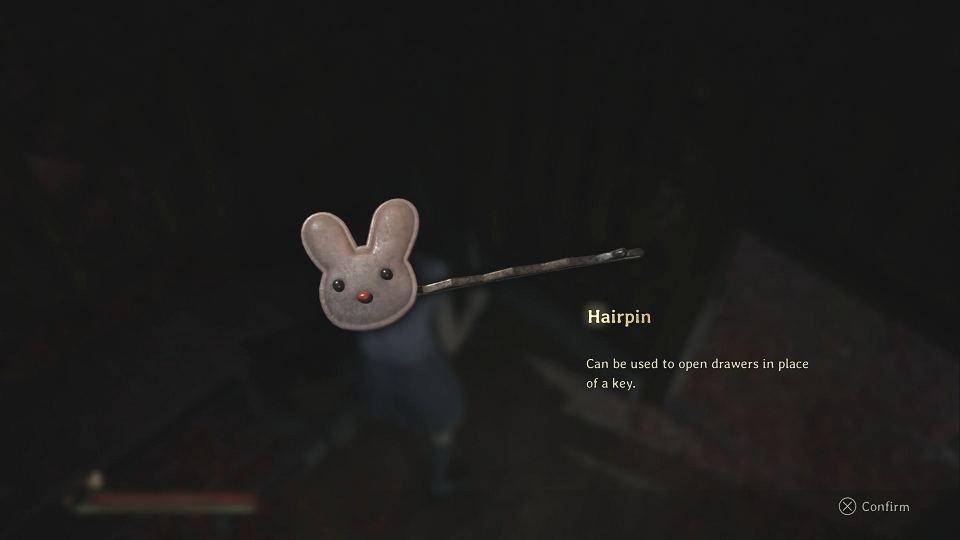
I didn’t really see anything notable changed in the trip to the middle school. Since I was in Story mode for puzzle, the key was in a different place, locked in a drawer that I needed a rabbit-shaped hairpin to open. There was also less to the locker puzzles. The school was also creepier since the scarecrow students appear from the beginning, not midway through. When Junko walks by, she tells you to say your goodbyes and also tells you flat out that you’re about to kill your friends.
He’s so supportive of my mutilation. (Credit: NeoBards Entertainment, Konami)
The third visit to the Dark Shrine is the most drastic and shocking change in New Game+. Seeing all the rituals earlier was the game’s way of telling you that you don’t need to go through them again. While you normally get those fox upgrades one by one during the fourth visit, here you start the third visit with all of them already in place. (All I could think was thank god I started taking screenshot footage by that point in my first playthrough or I would have had to play all over again on the base game to get the screenshots of the ritual!)
The powers are also upgraded so that you can soul siphon several nearby enemies at once. Plus, using an offering that restores sanity also fills your kudzu seal so you can go beast mode sooner. Being able to go beast mode really helped in this area.
Quite the funko collection. (Credit: NeoBards Entertainment, Konami)
On this second playthrough, I accidentally visited Sakuko’s area before Rinko’s, so I guess you’re not locked to doing them in order. In the first wing, there was a door you could not enter but now you can, thanks to the brooch. It’s full of ornamental dolls and a document that talked of the other wives of the fox deity. Through some of the documents I began to wonder if Fogworld was created by the wishes of the other characters rather than Hinako. (More on that later.) I also learned from one of Sakuko’s diary entries that she changed the school rabbit Mr. Bun’s name to Hinako and planned to kill it. (She really had more problems than we first suspected.)
No more pills. (Credit: NeoBards Entertainment, Konami)
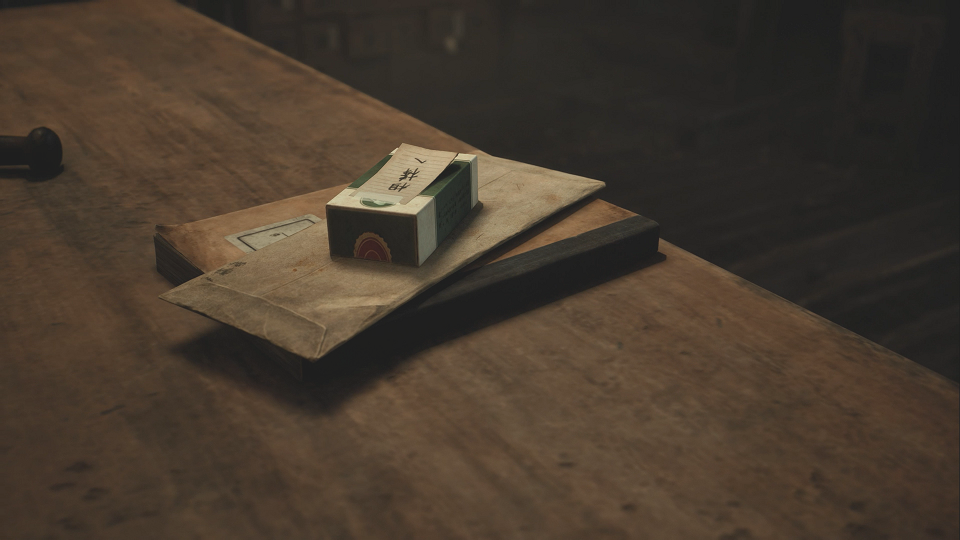
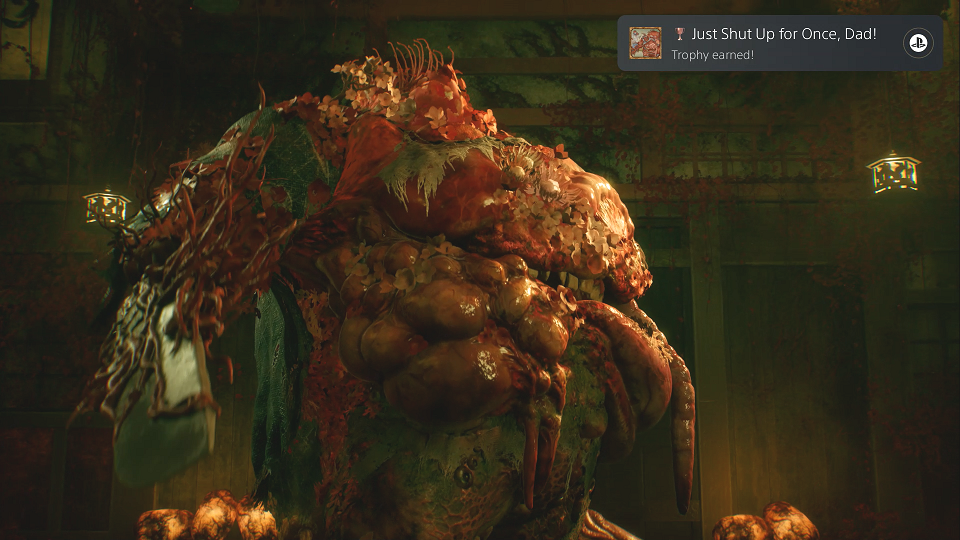
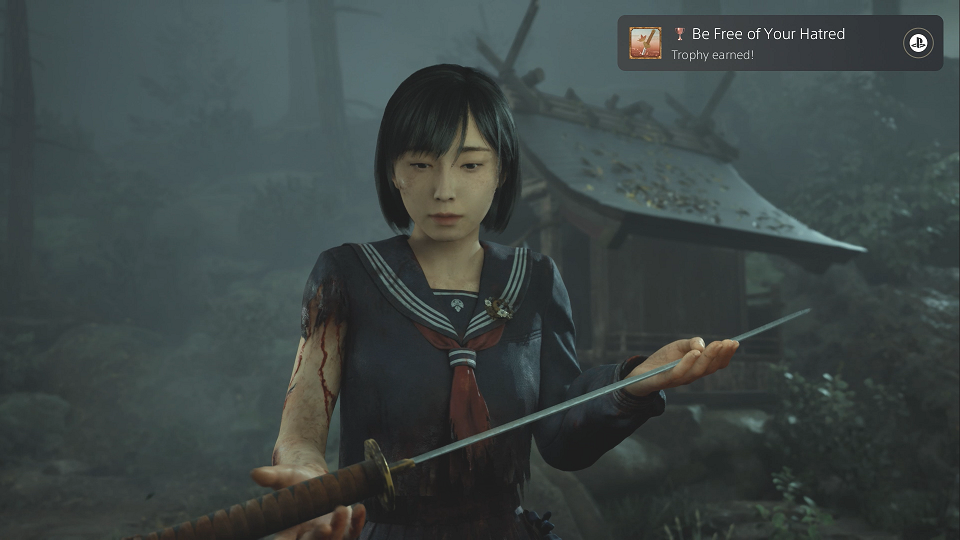
I skipped visiting the Forgotten Shrine this time since I was avoiding the Sacred Sword. Here, when you reach Shu’s house and enter his workshop, a cutscene happens where Hinako lays the pillbox on his desk. (Because as the ending suggested, I did not take any red capsules.) She decided to do this without drugs. I got a trophy for this and the red capsules stopped showing up for the rest of the game.
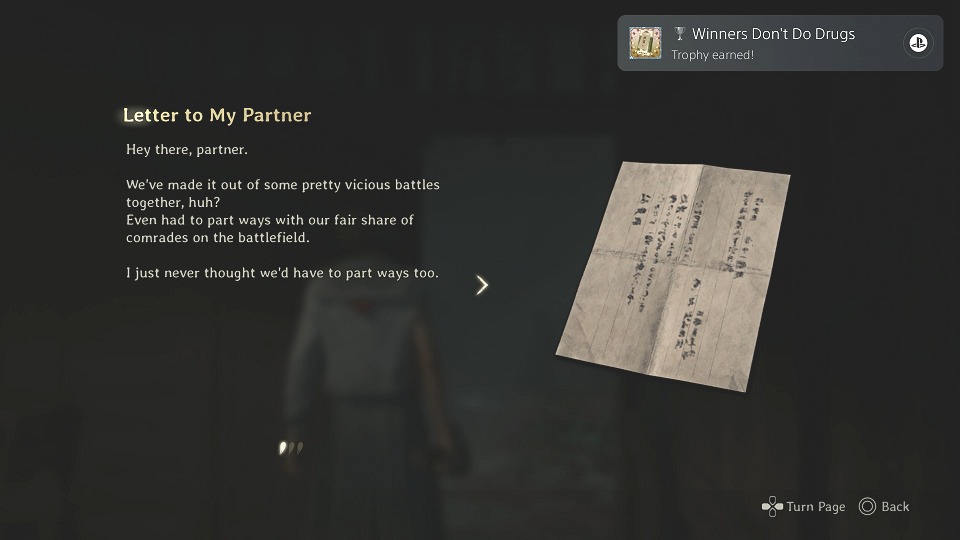
Great trophy name. (Credit: NeoBards Entertainment, Konami)
Shu had left her a letter, saying that she can’t count on him being there for her anymore because he can’t count on her now either. But no matter what, she’s still a part of Space Wars. She has tears in her eyes after reading this. This seems to be his goodbye letter to her before her real-life wedding.
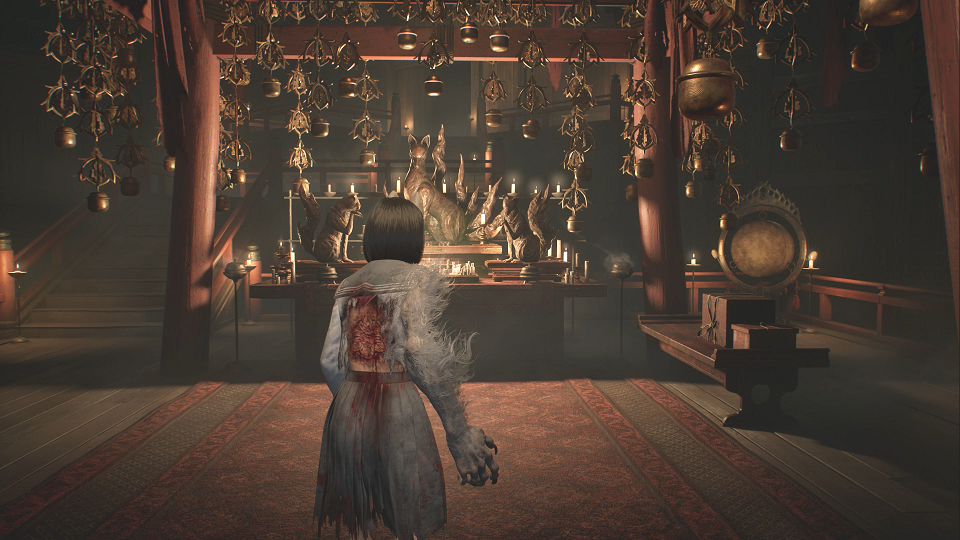
Fancy. (Credit: NeoBards Entertainment, Konami)
As mentioned before, the rituals are already done, so it’s possible to just skip straight to the final hidden door of this area of the Dark Shrine. I still explored to find items and because I needed one more vital piece to attain this second ending. This was harder than I thought it would be. I wandered around opening every door and melting every wall. The monsters were a pain. I still couldn’t find what I needed, so after nearly an hour, I broke down and looked it up. Even with a map it took a bit to find it. Up an easily-missed staircase, there is a secret room tucked away with a meltable wall that leads an intense battle with a crowd of monsters. After besting them I came across a hidden garden somehow nestled inside the Shrine.
The secret garden. (Credit: NeoBards Entertainment, Konami)
This garden was pretty cool. It looks like a chill place to hang out and meditate. This is also related to the Sacred Sword side quest, but since I skipped the sword, I saved the puzzle for a later playthrough. Documents indicate that a powerful water dragon is sealed here.
Later we learn a bit more about this legend. Yamata-no-Orochi, the 8-headed dragon, was killed in battle. One head flew to the place that would become Ebisugaoka and poisoned the water. (This relates to other lore we learned about poisoned water in the town and the tendency for the area to flood.)

I found an artifact. (Credit: NeoBards Entertainment, Konami)
After looking around I located a small bottle with red liquid in it called the Agura no Hotei-sama. (Hotei-sama Sitting Cross-legged.) With this in hand, I was finally able to proceed to the boss battle.
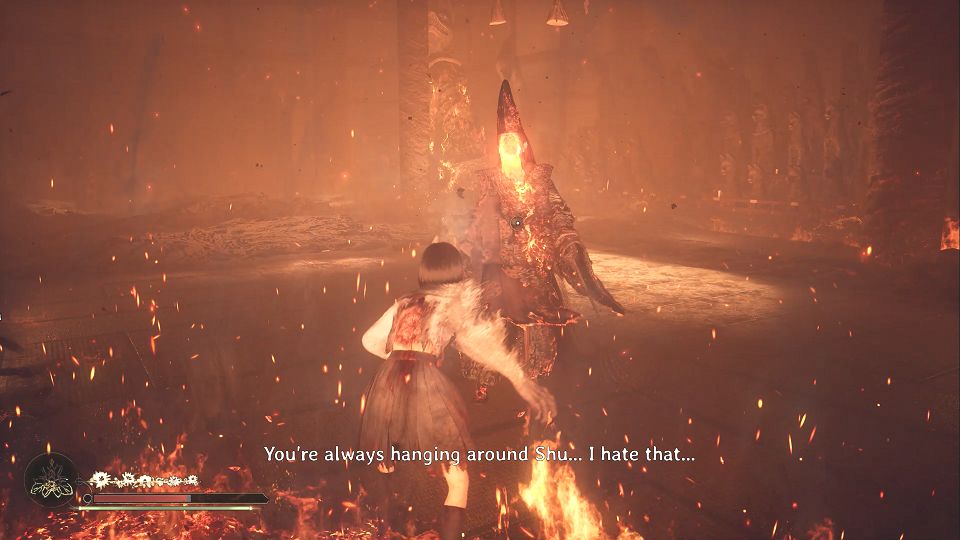
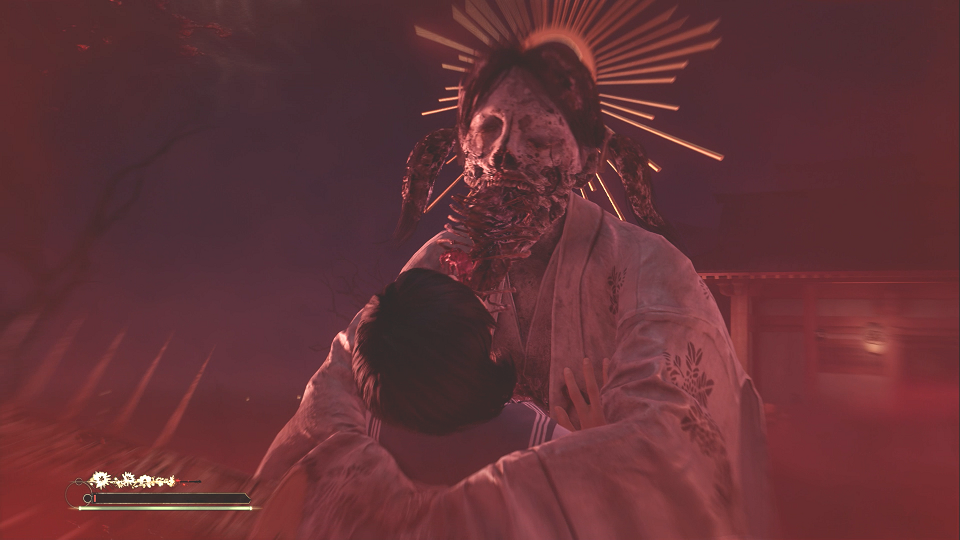
This is a hot battle. (Credit: NeoBards Entertainment, Konami)
As with the one against Sakuko, this battle was much more challenging in Hard mode. But, really, I ended up beating her much more quickly than on my first playthrough, mostly because I already knew her mechanics and that I had to keep an eye on her exploding dolls.

More goopy. (Credit: NeoBards Entertainment, Konami)
The conversation with Junko went a little differently this time around. Here, Hinako asks her if everyone’s a killer. Junko replied that, yes, she killed her mom, her dad, even her friends. Hinako will need to as well and she will have to decide if it’s worth paying the price. She must decide her own destiny, Junko only wants her sister to be happy.
On the way to the house, we learn that after Kotoyuki was bitten in the park, he became possessed by a fox and seemingly lost his memory. His entire personality changed after that. Interesting…
So many memories… (Credit: NeoBards Entertainment, Konami)
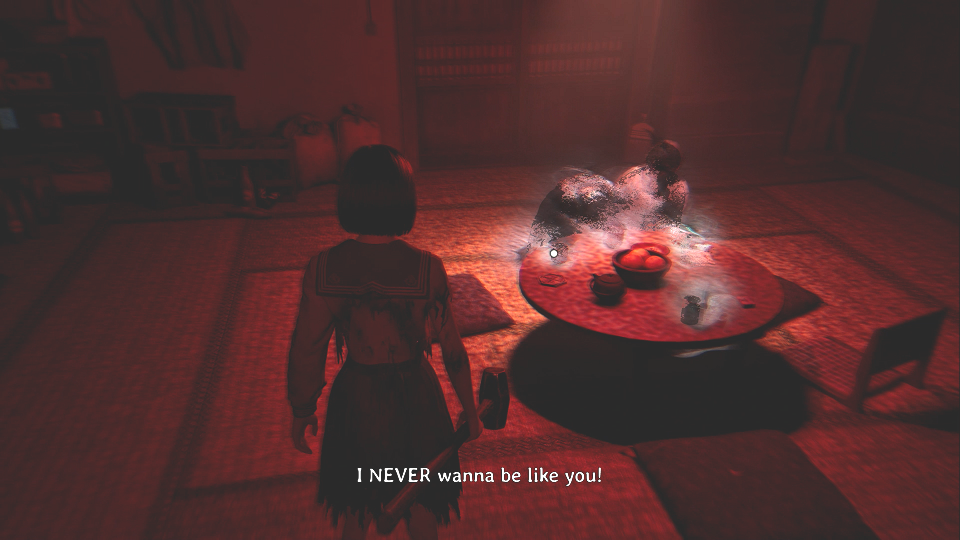
In Hinako’s house, the memories change. One shows a young Hinako refusing to wear a dress her mother got for her. In another, her mother tells her to ask her inner self for guidance. (Relating to the two Hinakos we learned about.) In one memory she screams that she never wants to be like her mother. We see her mother’s prescription list, seeing that she’s on a lot of meds. We also find a document talking about how some people with brain tumors hallucinate themselves as though seeing their reflection, but this self is negative and hostile. (Dark Hinako.)
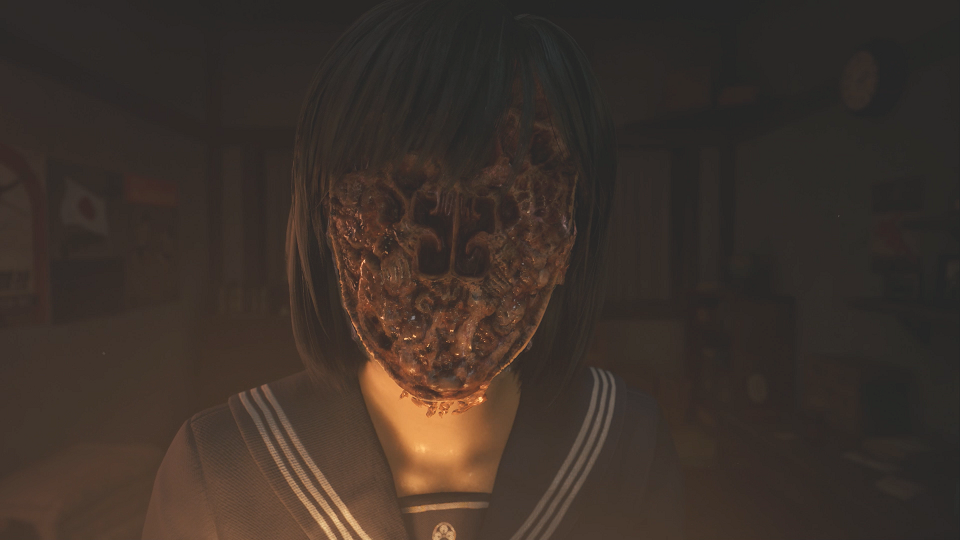
You ever yell so loud your face fell off? (Credit: NeoBards Entertainment, Konami)
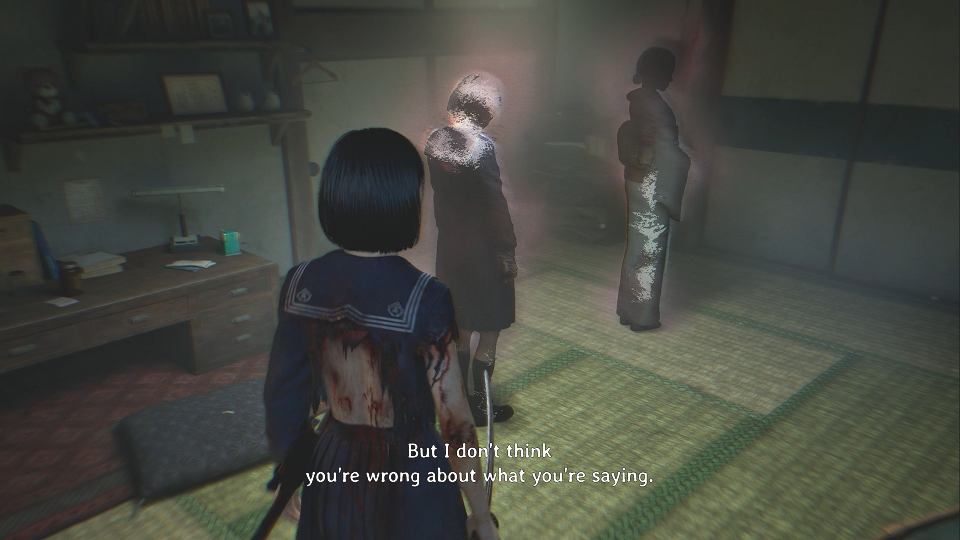
The conversation with Dark Hinako is very different in New Game+. Dark Hinako tells her that she has to die so she can be reborn. She can’t live like a baby bird forever, being fed by mom and dad and playing with friends. She’ll be abandoned by everyone and find herself all alone, every nest empty. Light Hinako panics, not wanting to hear it. Dark Hinako screams at her, demanding her wings and her face peels off, falling to the floor. This leaves behind a key to open her desk drawer. Inside are letters from Kotoyuki. It turns out that he was the man who wrote to her in the letter we found in the first playthrough. They kept in touch all these years after he was bitten by the fox and moved away.
The parent battle again. (Credit: NeoBards Entertainment, Konami)
Like all the bosses, the parents were tougher. Still, using the hand mirror and burning a bunch of healing items and toolkits, I managed to beat them on my first try.
That bird lady is back. (Credit: NeoBards Entertainment, Konami)
The mural in the Dark Shrine was much easier on Puzzle Story Mode. The riddle basically gives you the answer, which amused me.
I agree. (Credit: NeoBards Entertainment, Konami)
There was not much difference in the next stretch of the game, aside from the battles being more difficult. Especially the last one on the way back to her house. Yikes. That one took careful dodging and use of the kudzu seal. It still took me several tries.

The doll becomes helpful. (Credit: NeoBards Entertainment, Konami)
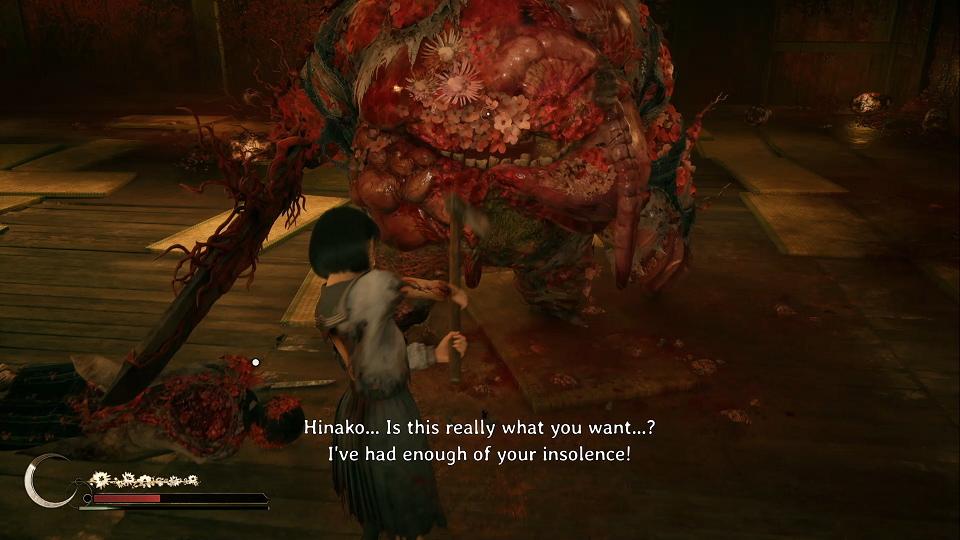
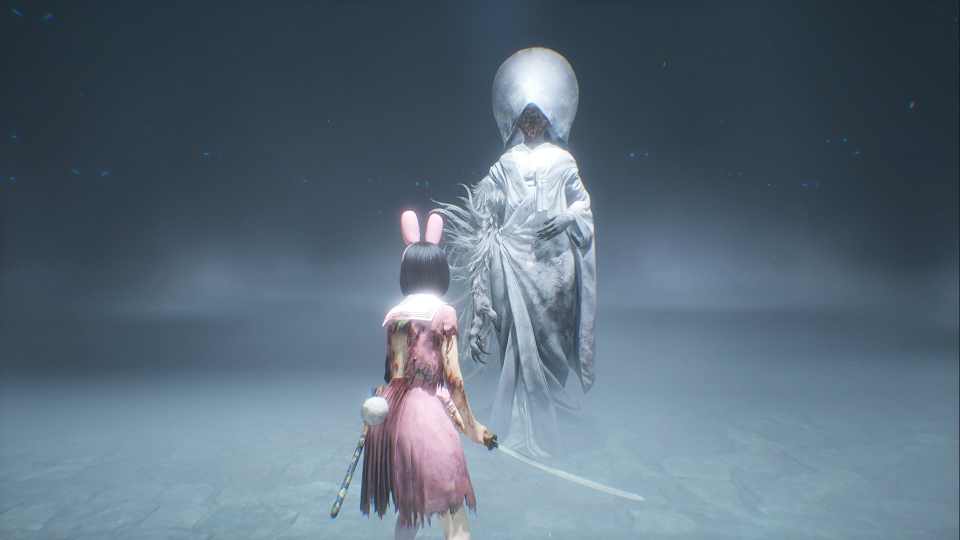
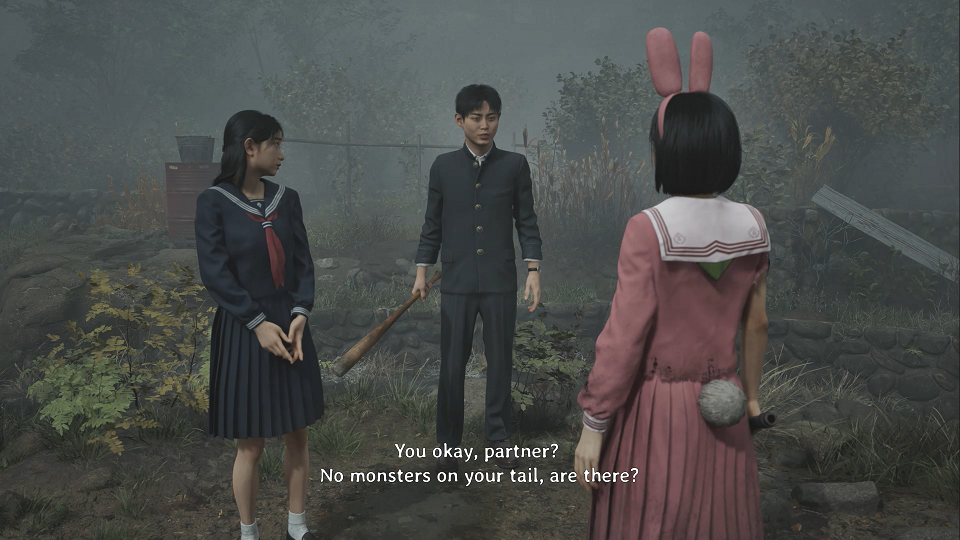
And now we’ve finally reached the end, where things drastically change due to the fact that I haven’t taken the red capsules and collected the Hotei-sama Sitting Cross-legged. Junko is there and tells Hinako to give in, to end Hinako’s suffering. Shimizu Hinako, she says, no longer exists. Just Hinako. She wonders how a spirit found her way here on this day and tries to cast her out. The doll appears on Junko’s shoulder and looks at her. Hinako turns and Junko is gone. Just like last time, she still has her freak out and breaks the altar. But then she’s faced with Dark Hinako in her fox girl form.
Time to kick some ass. (Credit: NeoBards Entertainment, Konami)
Dark Hinako strikes her and the Hotei-sama bottle falls on the floor. Light Hinako levitates, surrounded by a red aura. Fox Mask appears and gives Dark Hinako the Hotei-sama. She drinks the elixir. Fox Mask says she was possessed and dispels Light Hinako, who disappears. Shu is suddenly there and hits Fox Mask with the bat he’s carried throughout the game. (Must have high durability. I went through several bats myself.)
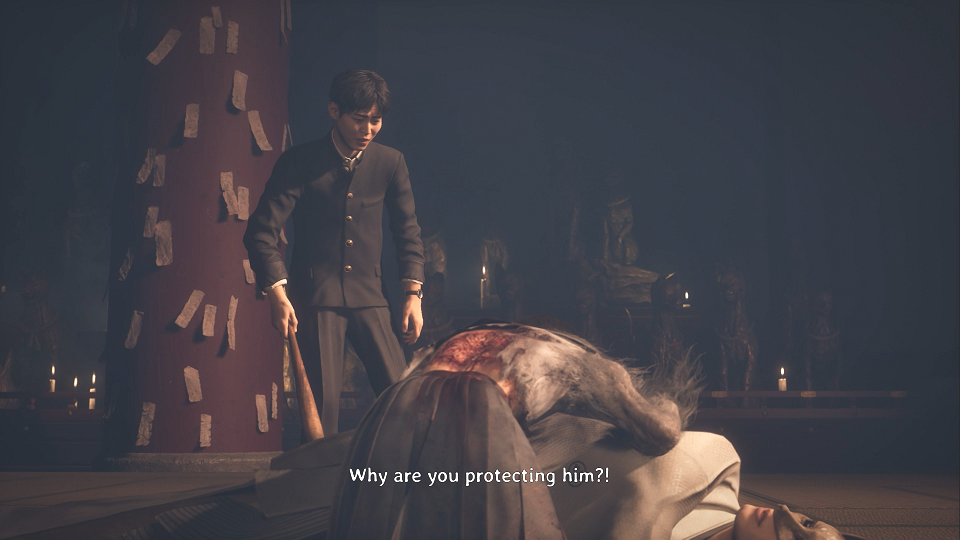
Hey, Shu’s alive. (Credit: NeoBards Entertainment, Konami)
Hinako protects him, which upsets Shu. Shu says that he swore he’d always keep her safe. She says they can’t be together and that things will never be the same. Shu asks why she trusts a nobody like Kotoyuki. (Which proved one of my theories since the first playthrough! Fox Mask is Kotoyuki.) Hinako says she wants a future with him, but she’s scared. If only she could split herself in two, she could keep being Shu’s partner. He drops his bat and runs off. Hinako tells Fox Mask to stay put and chases him.
Shu cries because he couldn’t just wish her well. And also because he gave her the capsules. They help you reflect within, but they can also be dangerous. He thought the capsules would make her see the truth and she wouldn’t want to get married.
So this answers another of the many questions the game left me with last time. I wondered if Shu was aware of the issues the red capsules were causing for Hinako. He seemed well-meaning, so it was hard to believe he was drugging her on purpose. It turns out that he was aware of the side-effects, but he thought that the spiritual aspect of the capsules would help her to see the correct path she needed to take. (Leaving Kotoyuki and being with Shu.)
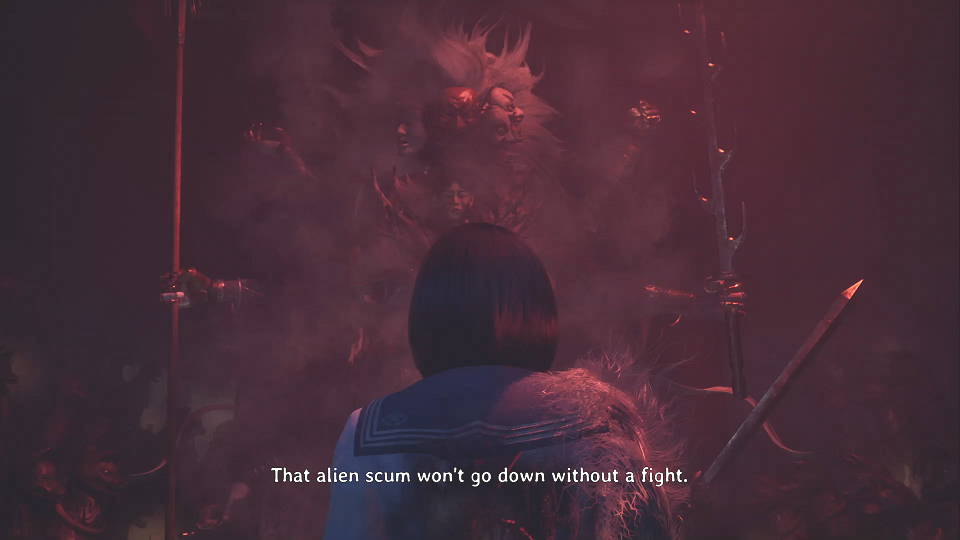
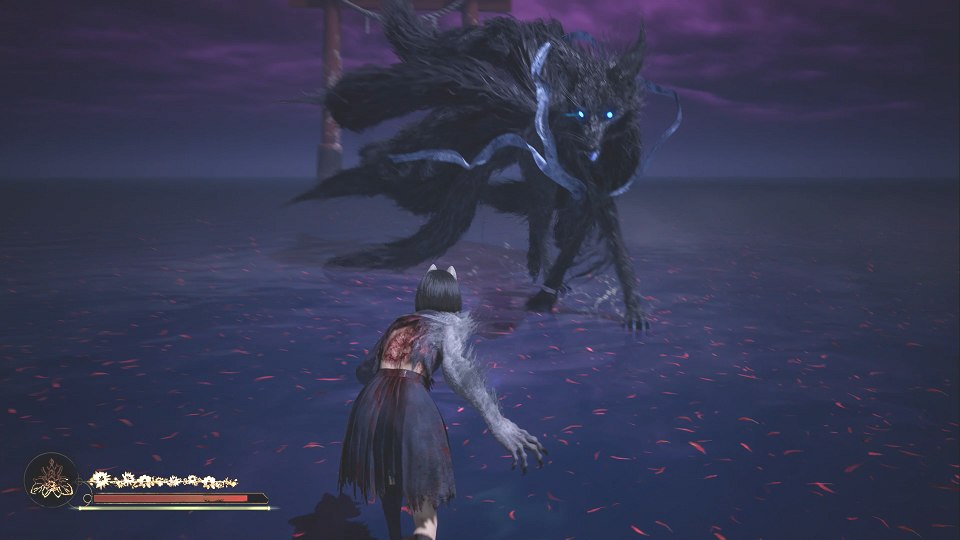
Damn it, Shu. (Credit: NeoBards Entertainment, Konami)
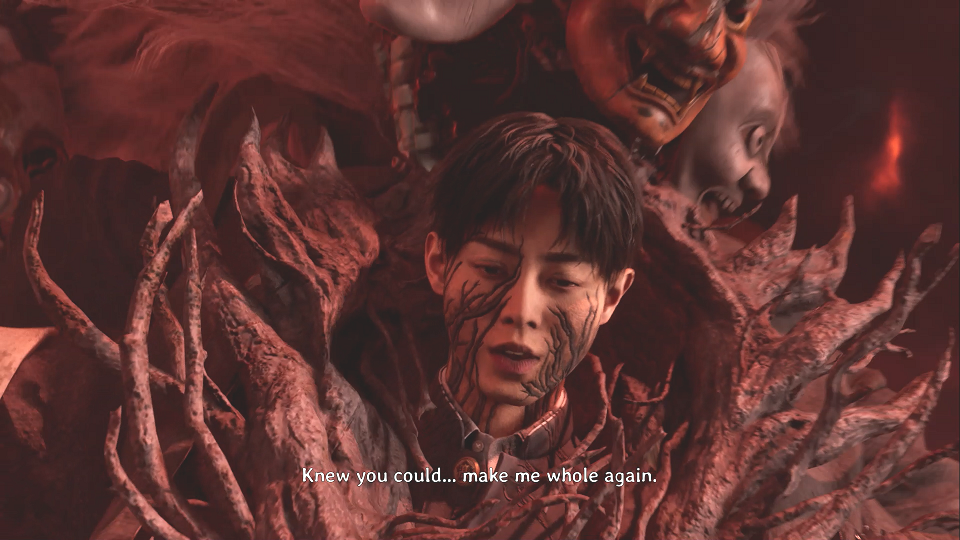
Dark smoke surrounds Shu and he becomes corrupted. He transforms into a nightmarish form and becomes the new final boss. This is the Tsukumogami. Shu is suspended in the monsters body, which is covered with oni masks and topped with a wild mane of white hair. He has several arms and wields a laser sword, spears, and a bow and arrows. (The light saber is obviously a nod to Shu’s love of sci fi, even though Star Wars didn’t exist at the time this game is set.)
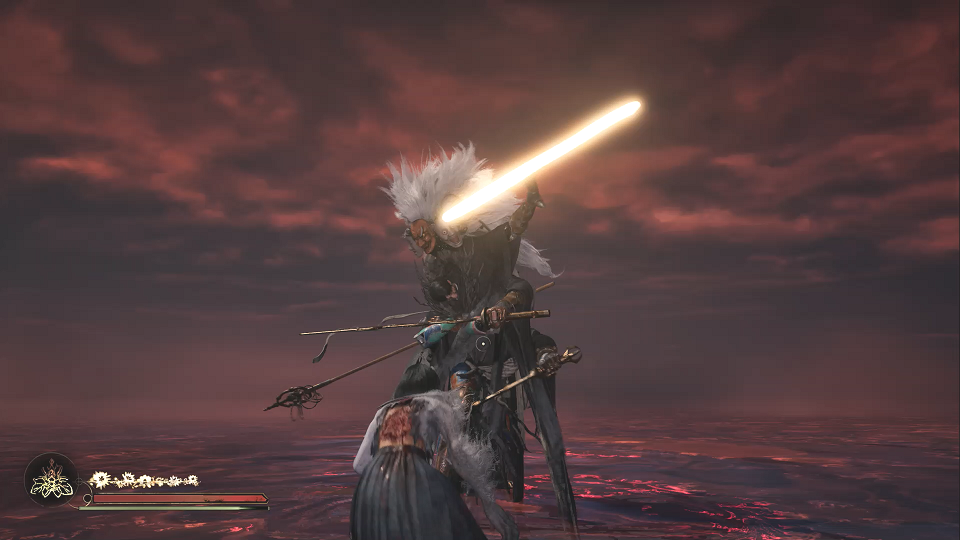
For legal reasons, this is Cool Generic Laser Sword. (Credit: NeoBards Entertainment, Konami)
The Tsukumogami battles quite differently from the Shiromuku. It races around the arena, slashing at you with its multiple weapons. At some points it retreats to the far end of the arena and fires arrows that rain down at you. He can also throw huge bubbles that you have to evade.
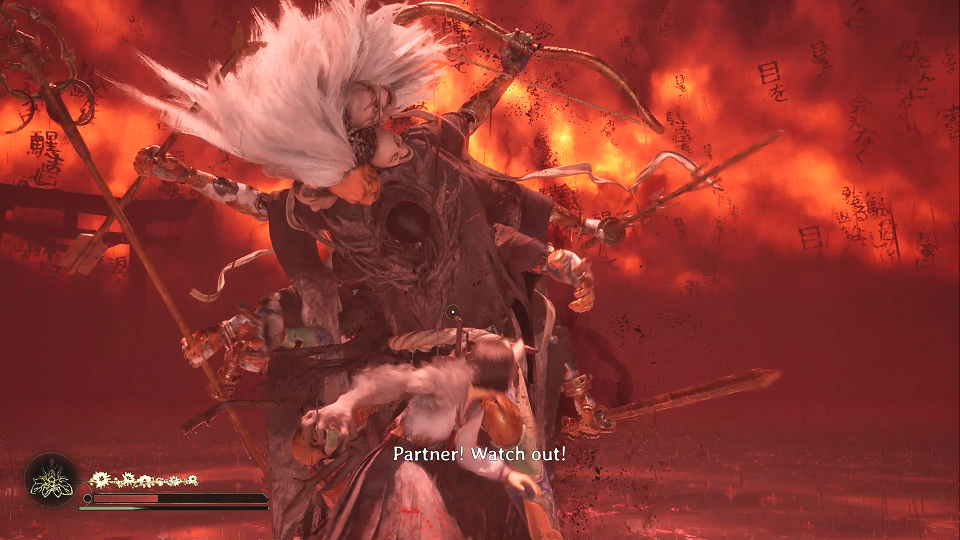
This was a cool fight. (Credit: NeoBards Entertainment, Konami)
Throughout the fight, Hinako tries to get through to him, reminding them of all their happy memories together. At times Shu is able to take over, freezing the monster and allowing for some easy damage. (This serves the same purpose as the stuns in the Shiromuku battle, which indicated a change in phase.) Note that unlike the Shiromuku battle, this fight does not resurrect you when you fall. Also, since you fight with your fox arm, all the weapons and toolkits I hoarded were useless to me.
Usually bosses don’t thank you for beating them. (Credit: NeoBards Entertainment, Konami)
Shu thanks her as she delivers the killing blow. The monster falls from him, leaving him normal again.
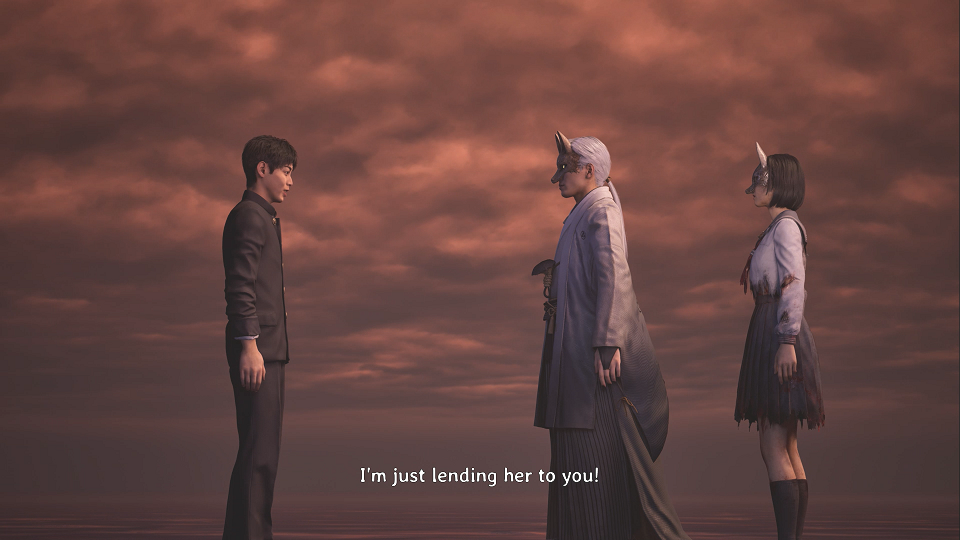
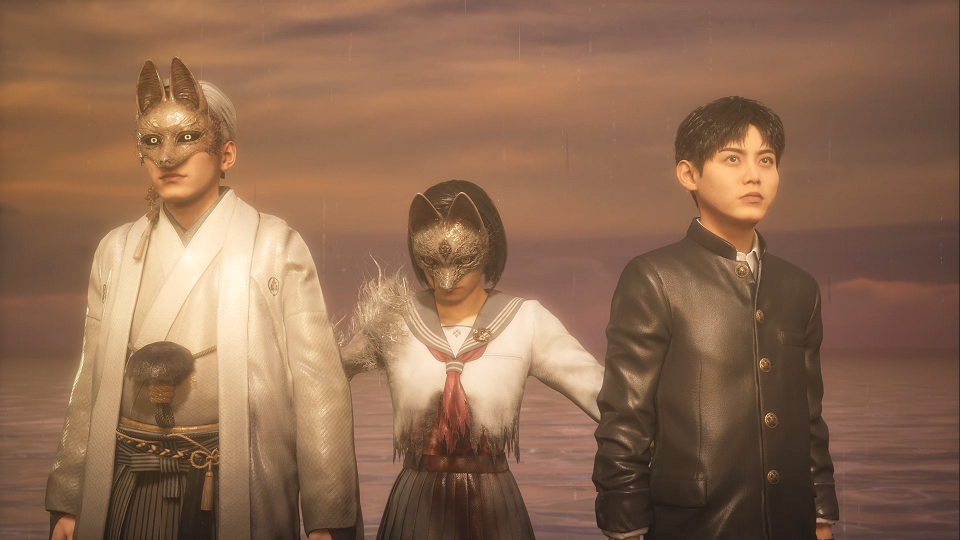
They’ve come to an understanding. (Credit: NeoBards Entertainment, Konami)
Shu tells Kotoyuki to look after her, and if he ever makes her unhappy, Shu will beat him to a pulp. The get aggressive towards each other about her but Kotoyuki offers his hand and Shu reluctantly fist bumps him.
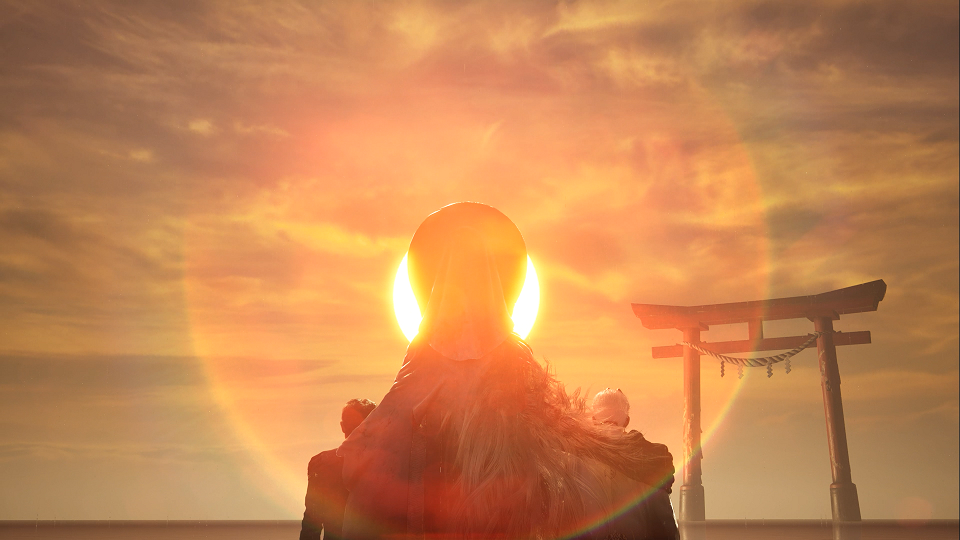
A touching moment. I guess. (Credit: NeoBards Entertainment, Konami)
Becoming the Shiromuku again, Hinako puts her arms around each of them as they watch the sun rise.
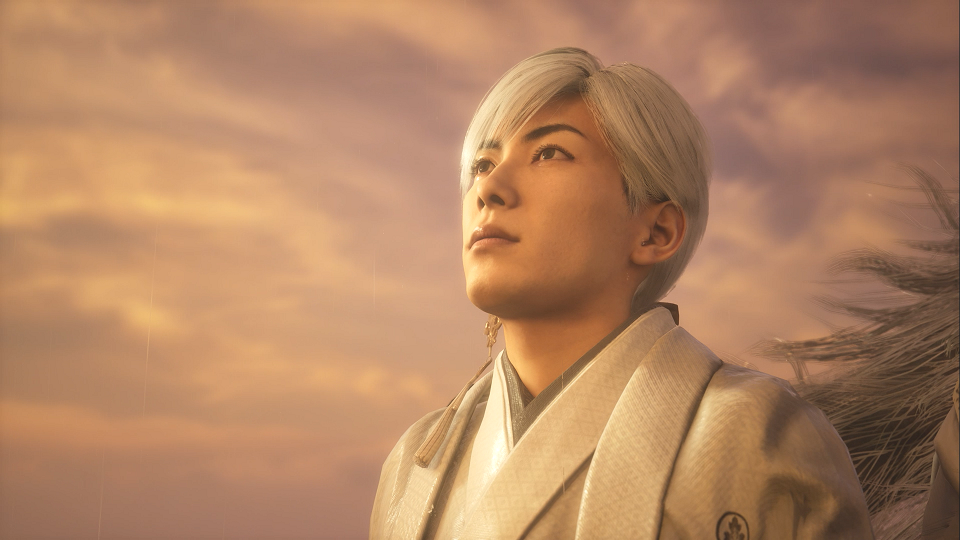
Hey, why does he get a face? That’s not fair. (Credit: NeoBards Entertainment, Konami)
And then— SHOCK— Fox Mask removes his mask and we can see what Kotoyuki really looks like. He just looks… normal. I didn’t expect him to ever take his mask off, so that was jarring. Especially jarring was seeing that he was just some ordinary dude and not a twisted fox-man hybrid. The credits roll.
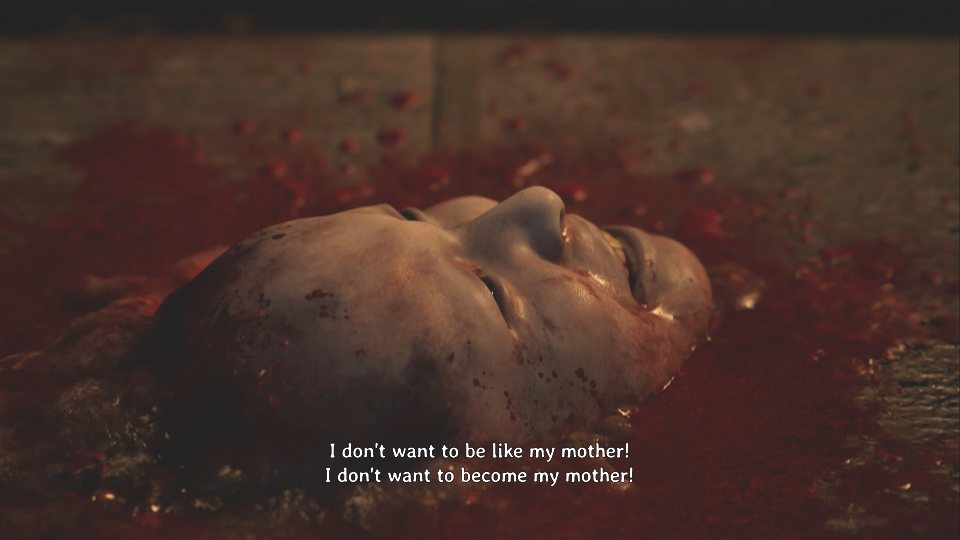
Eww. Face. (Credit: NeoBards Entertainment, Konami)
In the mid credit scene, the Shiromuku and Kotoyuki go inside the Shrine (no sign of Shu) and we hear Hinako’s increasingly panicked voice crying and saying that she’s scared. A blood trail leads to her removed face, still alive and screaming on the ground. She screams “I don’t want to be like my mother!“ and Junko steps on her.
So that was the second playthrough wrapped up. We got more of the story, a new boss battle, and got to see more of Dark Hinako’s and Shu’s perspectives. We found the secret garden and several items that I couldn’t find the use for— a sandal, a brazier, an old flask, Hinako’s father’s knife… I suspected they all related to the sword side quest. We also got to see that my theory was correct, and Fox Mask is actually Kotoyuki. But is it really him possessed by Inari-sama, or is it a twisted version of him in Hinako’s mind? We also saw why Shu didn’t have a boss form like her other two friends… they were saving it for New Game+. This ending also gave us more insight into why there are two Hinakos. They appear to have born from her wish (SH2 nod!) to split herself in two and follow both paths her heart wants to take. I did wonder as the credits rolled why this was considered the “bad ending” since it seemed to be a light-hearted resolution between the three of them. The mid-credit scene of Hinako’s discarded face’s tortured cries revealed that this was, indeed, a bad ending, despite the hopefulness prior to that.
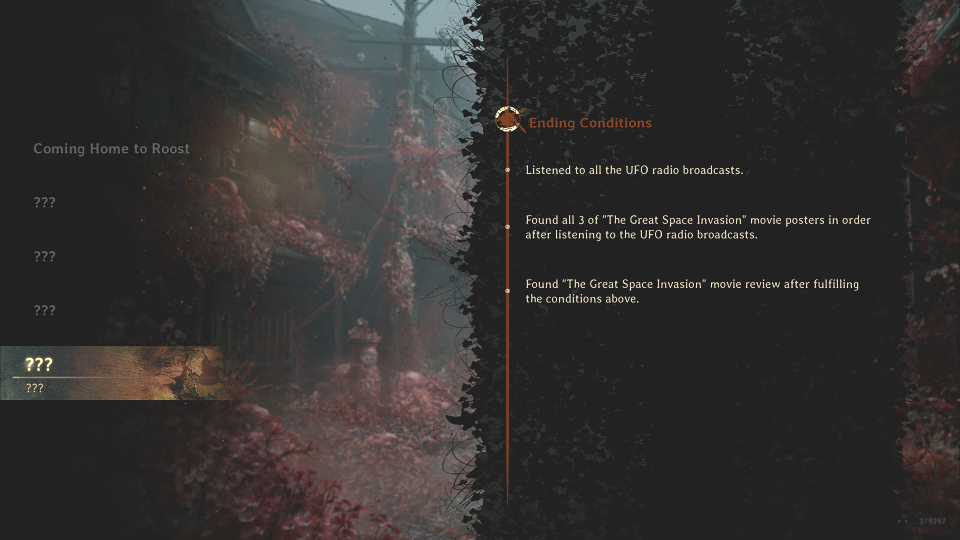
The UFO ending requirements. (Credit: NeoBards Entertainment, Konami)
For the third playthrough, I decided to get the fifth ending, the UFO ending. This should be familiar to Silent Hill fans. Parts 1-3, Origins, Homecoming, Shattered Memories, and Silent Hill 2 Remake all have UFO endings. This ending in Silent Hill f was foreshadowed throughout the game with the references to the childhood game of Space Wars played by Hinako and Shu.
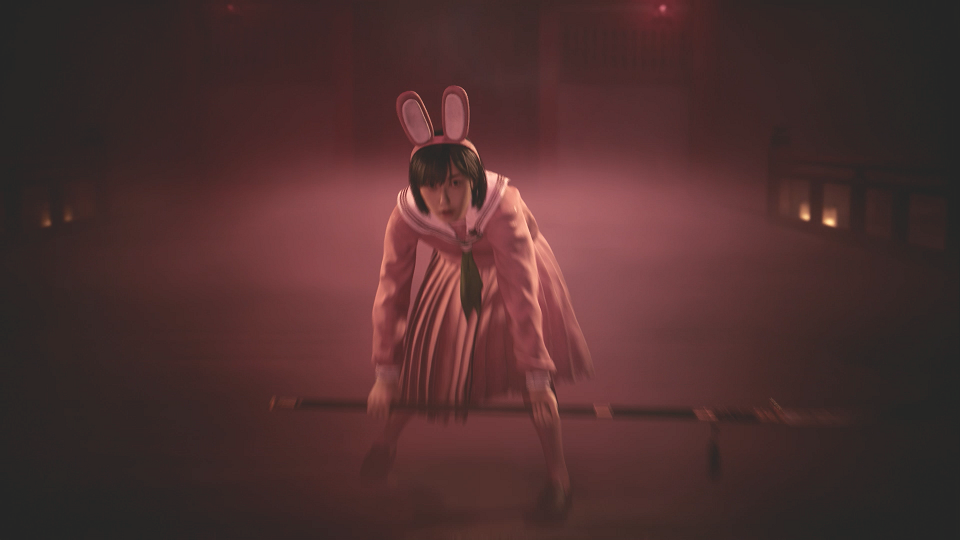
The requirements for this ending are to use the radio early in the game, look at the three Space Wars posters in numerical order, find the UFO toy, and pick up the document next to it. This can all be done pretty quickly, allowing you to bypass most of the game. (The ending is triggered on the way to Shu’s house before reaching the school.) I played this time through on Story difficulty for both options to make it faster and easier. I also finally put on the pink rabbit uniform for this session.
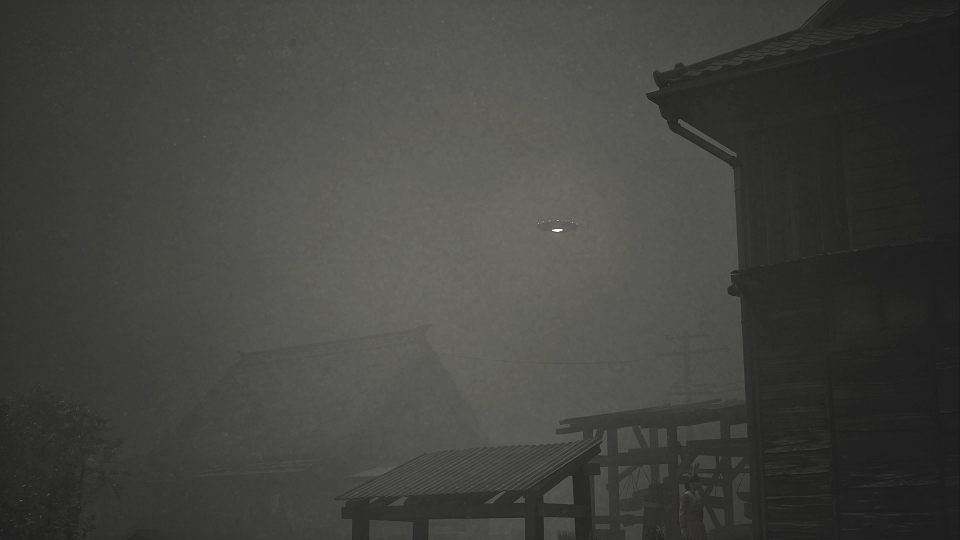
A UFO is spotted. (Credit: NeoBards Entertainment, Konami)
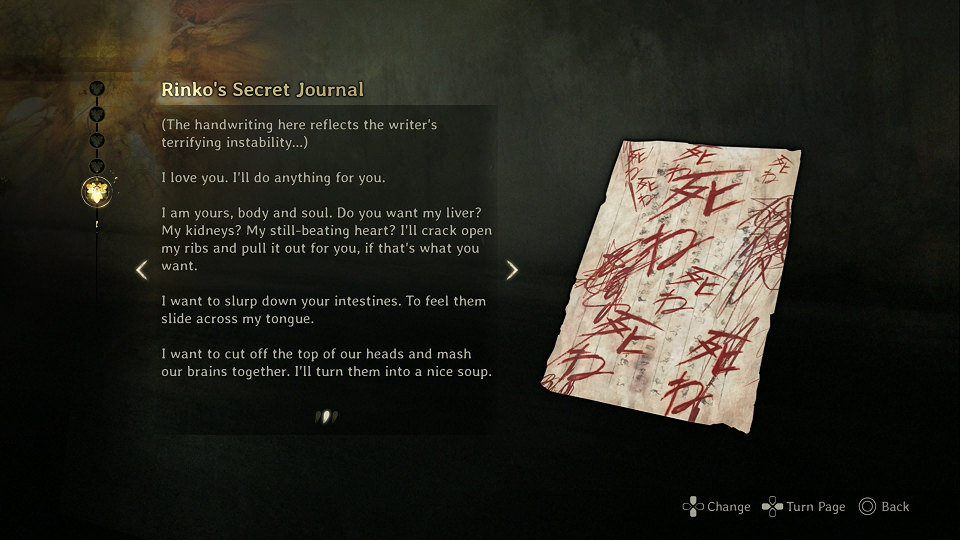
This will be a pretty quick section, since you only need to get past the second Dark Shrine area to win. This was my third time through the scarecrow puzzle, and it was the final set of documents related to that puzzle. These were cards from Rinko. The last one says “Today is your funeral.” She hopes Shu will finally give up on her. (I wondered at this point if Hinako really did die or if they were referring to her wedding as a funeral?) We also learn from the cards that after Hinako left, Shu kept playing Space Wars by himself. In the new journal entry, Hinako says that Shu doesn’t let little things like reality get in his way. Some interesting insight into his character there.
I also upgraded my Omamori slots to the max of 5 this time and learned one more piece of lore. The naginata is a traditional gift that the Tsuneki men give to their brides and it’s always customized. This time the handle was adorned with a fledgling bird. (For Hinako, which could be translated to mean baby bird.)
To get this ending you have to listen to a radio broadcast stating that the bridge out of town was destroyed by something unknown. The three posters reference a movie where the aliens are body snatchers and sent little UFO drones around to take people over. After each poster one, two, and three UFOs respectively fly off. After viewing the three posters in order you have to brave the flower monster and three dolls to reach the General Store. (The monster gets back up, so you have to be fast. I had to kill him twice. Also, there is a trophy for defeating him, so that was a nice little extra.) Outside the General Store is a small UFO and a movie review talking about how you never actually see the aliens and the true horror is in the unknown and the fact that anyone you know and love could have been taken over. (Fitting the theme of this game.) After reading that, the ending is triggered.
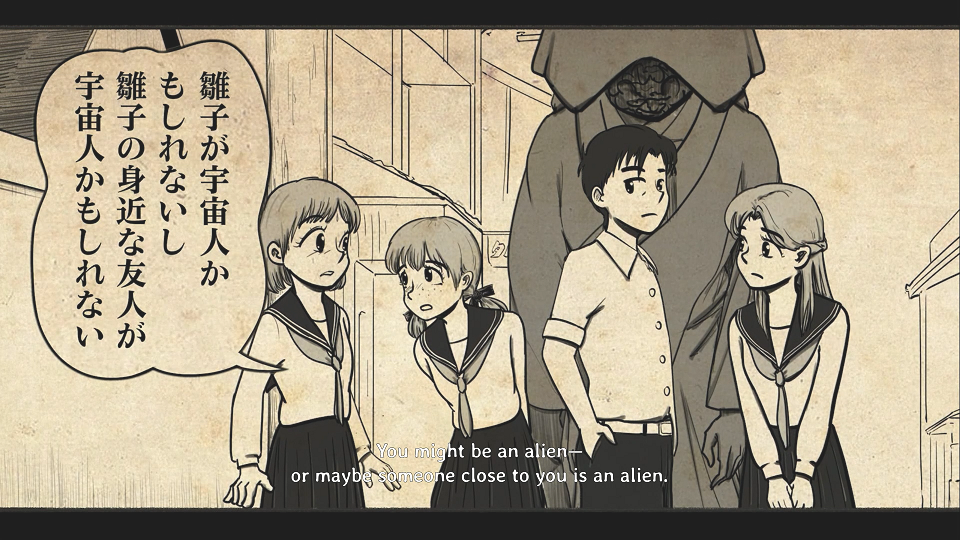
Haha so weird. (Credit: NeoBards Entertainment, Konami)
The ending is in an amusing manga style. Hinako, Shu, and Rinko are talking about the aliens that are said to be invading. Sakuko walks up with the Shiromuku and everyone is shocked, saying they thought she died. She explains that the Sakuko who died was actually an alien. The Shiromuku is also a robot named Roboko, designed to detect and destroy the aliens, but its battery runs down before it can do anything. When Shu imagines the aliens, he sees the grays that we’ve seen in other Silent Hill UFO endings.

Pod people? (Credit: NeoBards Entertainment, Konami)
When Hinako mentions that Roboko was chasing her all over, Rinko suspects she may be a disguised alien. Any of them could be. The aliens can even copy your memories, but get things wrong sometimes. To figure it out, they have to tell embarrassing things about each other that only they would know. Rinko’s of course, involves Shu. (Stealing his clothes and a lock of his hair.) These are all really silly. Shu talks about when they each started wearing bras and the three girls beat him up. They all decide none of them are aliens and Hinako’s parents arrive to tell her it’s time to go home. Father says the neighborhood watch got together and took care of all the aliens. As they walk away, Mother says that she made Hinako’s favorite, hamburg steak. Hinako says that’s Junko’s favorite, indicating that her parents are actually the aliens.
Wheee! (Credit: NeoBards Entertainment, Konami)
A UFO pops up being piloted by Mira, the shiba inu dog from Silent Hill 2’s infamous Dog Ending. As the credits roll, playing an incredible throwback sci fi techno song, Mira keeps popping back up with more passengers. At the end she only has two girls and one boy, so I’m suspecting poor Sakuko with her abandonment issues was left behind again.
The Silent Hill UFO endings are always fun and this one was no exception. I like all the nods to the story (like Hinako telling Rinko she will burn in hell) and the appearance of Mira was an unexpected but nice surprise.
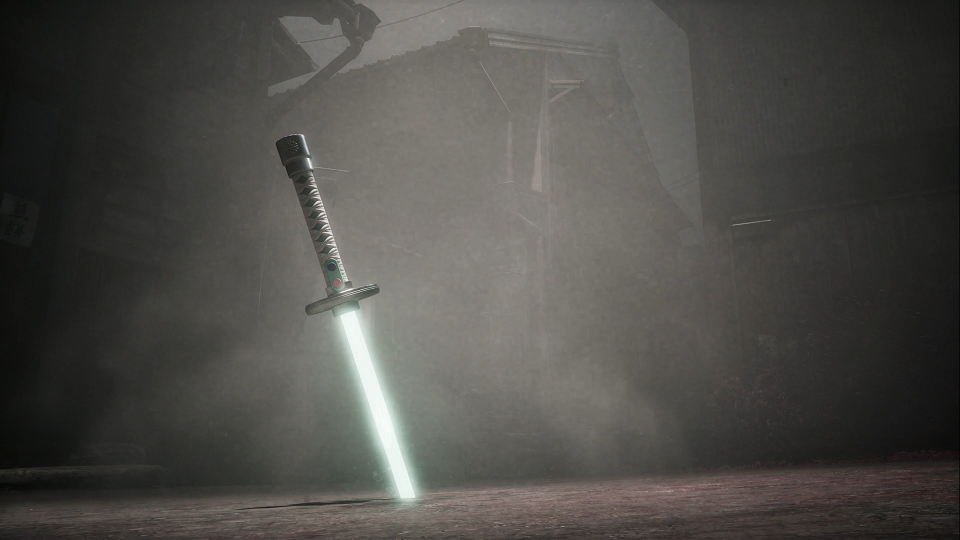
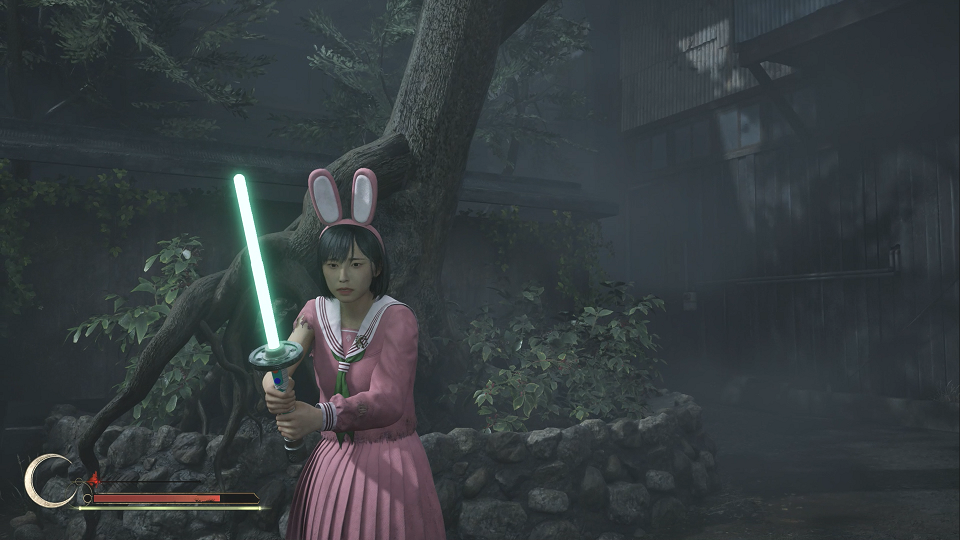
Now I have my own Cool Generic Laser Sword! (Credit: NeoBards Entertainment, Konami)
LASER SWORD!!! This is the main reason I knocked out the fifth ending on my third playthrough. I figured it would help me on my next playthrough. This weapon has durability but it slowly recovers as you kill enemies with other weapons. It also gets longer based on the number of endings you’ve seen on your save file.
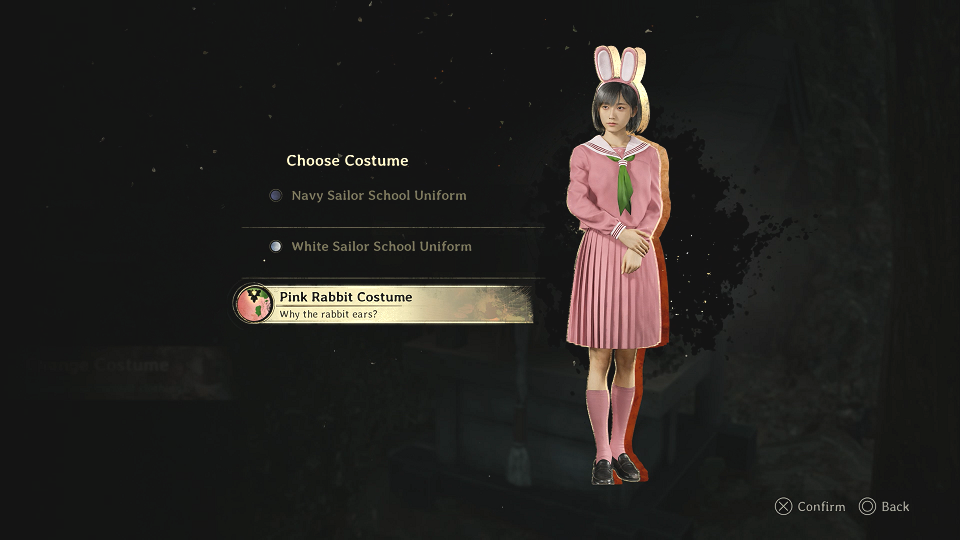
I’m gonna be a bunny fox girl. (Credit: NeoBards Entertainment, Konami)
For my fourth playthrough I continued to use the pink bunny costume I got for upgrading to the Deluxe Edition. I also set both difficulties to “Lost in the Fog” so I could polish off those trophies. This run was made even more difficult due to the fact that I took a few months off between play sessions. I played the game through twice before I wrote my Part 1 post, did my UFO ending shortly after and then took an extended break before getting the last two endings.
The requirements for this ending are to not take the red capsules, and find the Sacred Sword and DO NOT purify it. Lost in the Fog mode ramps up the difficulty in combat, makes items even more scarce, and makes the puzzles more vague. Add in the fact that I had to hunt for all the items to break the seal on the Sword and fight yet another new final boss, and this playthrough was a trial that took me about two weeks of evenings. (Note that I did consider playing the hardest mode for the UFO ending, but some quick research told me that the trophies don’t pop on that ending since you don’t play through the entire game. I guess that would be pretty cheap, so the devs thought of that workaround. Ah well.)
The quest begins! (Credit: NeoBards Entertainment, Konami)
Since this ending requires the Sacred Sword, I had to complete the side quest to obtain it. Early in the game, you can access a house that was inaccessible in the first playthrough. Access is granted in New Game+ due to the brooch which you start each New Game+ with. In this house is a fairly easy scavenger hunt that requires you to find boxes within the house in the right order to get an old doll that is placed at one of the five Jizo statues placed around the town to break the first part of the seal. You also get an additional inventory slot in here and the first of the research notes for the sword side quest. I actually entered this house and found the research note and doll on my second playthrough but since getting the sword could inhibit that ending (you have to purify it) I chose to abandon the quest altogether until this point.
The cut scenes are so much better with this outfit. (Credit: NeoBards Entertainment, Konami)
Researching the optimal Omamori loadout for Lost in the Fog, I went with a build that allowed for easier perfect dodges, auto counters and counters on perfect dodges, and stamina recovery. (Beetle, Boar, Rabbit, Serpent, Suzuran.) One problem was that I had never found the Rabbit Omamori on my previous playthroughs, so I had to wait until I got to the school to find that one. (That’s the one that lets you counter attack on perfect dodges.)
Once my loadout was complete, it allowed me to dispatch enemies with ease, but there were times when I had to swap out some Omamori for others depending on the situation. Note that since I had last played, there was also a patch that made some changes to combat and lowered the amount of enemies in some areas.
Even with all this in mind, the fights were tense and unforgiving. The higher difficulty meant less healing items, so there were many times when I would let Hinako die or reload from my save when I knew I could do better.
Bunny with a spear. (Credit: NeoBards Entertainment, Konami)
The Sakuko boss fight took me about an hour. The Rabbit Omamori would have made it much easier, but I had to muddle through without it. Her moves appeared to be shaken up a bit from the easier difficulties and it took a lot of new strategy and quick thinking to get around her attacks. It was brutal, but ultimately a pretty satisfying boss battle.
In the school I found a hidden room which held the Rabbit Omamori that I had been sorely needing. In plot news, I also learned about a game the middle schoolers played where they would predict their own deaths. Note that Hinako’s friends’ deaths matched what we see in the game— Rinko died in a fire, Shu by suffocation (hanging), and Sakuko by a heart attack. (Which I guess happened when she was left alone in the darkness.)
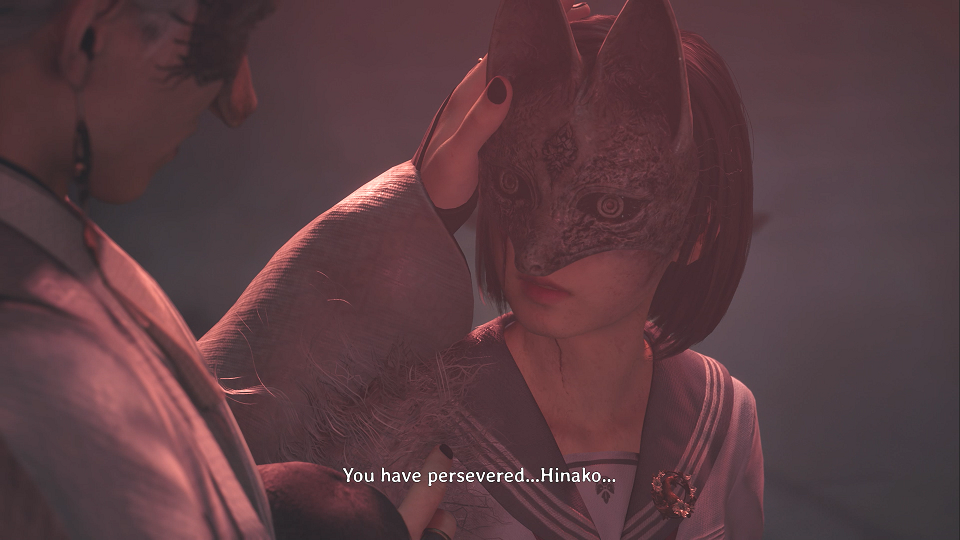
Also, since I had gotten the second ending, there was a new brief scene after the school where Katayuki had his mask off for a moment. He said that since she’d saved his life, he would save her soul by claiming the life of her old self. When Hinako regained consciousness, he quickly put his mask back on.
It’s a short sword. (Credit: NeoBards Entertainment, Konami)
Since I had completed the UFO ending, I got the light sword finally. Since I only had two main endings, the blade was not very long yet. I didn’t end up using it much in this playthrough. There were just weapons that did more damage.
This girl has issues. (Credit: NeoBards Entertainment, Konami)
In the Dark Shrine I was able to locate some new diary entries where Hinako’s friends started to see how wrong they were about her. Sakuko repents calling her friend a traitor, seeing that everyone has to live life at their own pace and Hinako living hers didn’t mean she was abandoning her friends. We also learned that she was plied by an evil god to restore the old shrine, which was what made her become the evil Miko that we fought earlier. This god was probably one of the things that Sakuko used to sense in the darkness since she was sensitive to spiritual entities.
We get more backstory about the religions in the region. There was an old goddess who was the true Inari. The fox took over the people’s faith and they started calling him Inari-sama instead, forgetting the goddess Inari. This started a feud between the gods, and Sakuko was one of those caught in the middle.
Rinko realized that she had let herself focus too much on her bitterness towards Hinako and her self-superiority. She realized that her jealousy outweighed her love for Shu and if she had been able to get over it, she may have been able to learn more about him and get closer to him.
Nothing changed in Shu’s area of the Dark Shrine except that I had to find three items due to the puzzle difficulty.
The mask is a bit less creepy in pink. (Credit: NeoBards Entertainment, Konami)
Around this point I finally noticed that Hinako’s fox mask is now pink. I guess it has to match her pink uniform? This was a cool detail.
Since I didn’t have the Sacred Sword yet and wasn’t going to purify it anyway, I skipped past this entire shrine section, rushing to the next boss and bypassing several battles that would have eaten through my resources.
It must be tiring to be Rinko’s friend. (Credit: NeoBards Entertainment, Konami)
The Rinko fight was as difficult as I expected, but didn’t take quite as long as Sakuko did because of my Omamori set up. It still took several tries and most of my healing items, but I did it, relying on the auto counters.
After the battle, I found the final Clinical Trial memo and realized that Shu was the one who wrote those. They detailed his research and experimentation with the red capsules. He used them to have lucid dreams and met his other/inner self. This is why he gave them to Hinako, thinking that if she could go an an introspective journey, she would change her mind about the wedding. This answered a big question I had as to why Shu gave them to her to begin with. He didn’t reaiize she would abuse them, take too many, and go berserk at her own wedding. (See first ending.)
I finally have the sword! (Credit: NeoBards Entertainment, Konami)
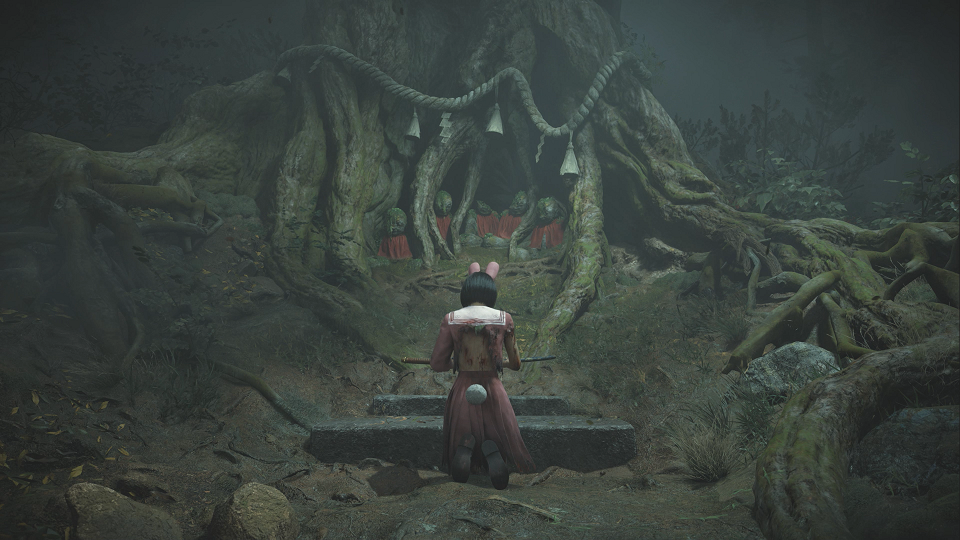
On the way back to Hinako’s house I found the last Jizo statue. Hinako, in a trance, tells herself to go back to the Sacred Tree. I immediately backtracked to get there, encountering a few newly spawned monsters, some of which I was able to avoid. Once there, the Sacred Sword was just lying there, waiting for me.
Awesome. (Credit: NeoBards Entertainment, Konami)
I used the sword as my main weapon for the rest of the game, only sheathing it when the durability got low. (It recovers its durability as you use other weapons, like the light sword.)
They didn’t coordinate their outfits. (Credit: NeoBards Entertainment, Konami)
Back at the Shimazu residence, I found some new diary entries written by Hinako. She considered her arranged marriage to be a funeral, an execution. She mentioned they’re slapping her name on some other piece of meat and she wouldn’t be herself anymore. She again refers to herself as a baby bird who needs to spread her wings, continuing the bird imagery. We also see some new scenes with Shu trying to get Hinako to open up about her thoughts and feelings. He also finds her love letters with Kotoyuki but she refuses to talk about them.
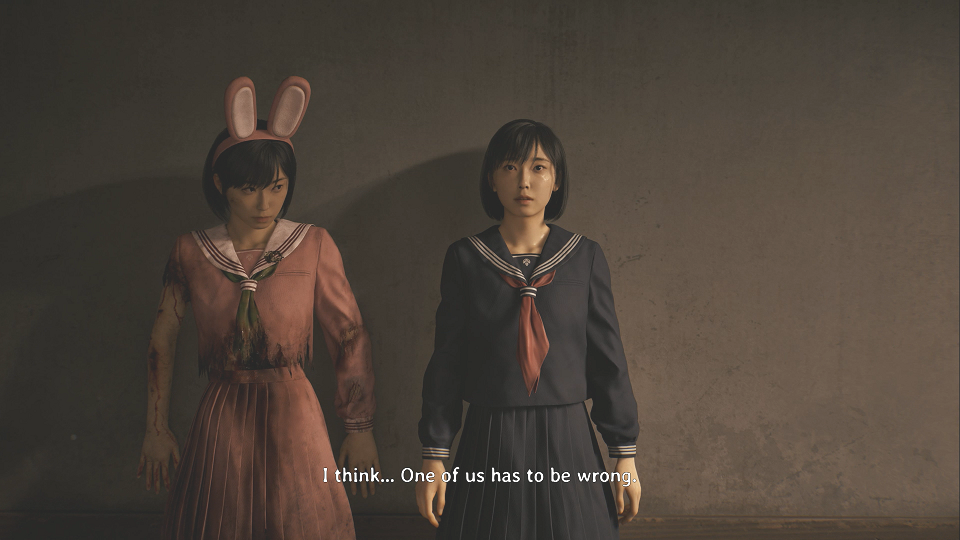
Her confrontation with the other Hinako is completely different. Instead of being accusatory and bitter, Dark Hinako is desperate and scared. She demands to know if this strange feeling she has is love. Light Hinako tells her that if it is love, it’s completely different from what she feels for Shu. Dark Hinako tells her that even though they’re both Hinako, one of them has to be wrong. She once more demands that Hinako kills her and her face slides off like before.
Mom and dad again. (Credit: NeoBards Entertainment, Konami)
The boss fight against the parents was way easier than I expected, considering how tough the first two bosses were. I put some thought into my Omamori loadout, tweaking it a little. I still relied on the dodge counters, running to heal and keeping the mom in sight at all times. I managed to kill the father first this time, getting the trophy for that.
Nearing the end now. (Credit: NeoBards Entertainment, Konami)
The challenge steepened in the Dark Shrine. I kept getting swarmed by enemies and had to be very careful fighting, using my Beast Mode whenever the seal was filled. It was rough.
After I finally managed to finish the mural section, the new patch of the game gave me the option to skip to the end, bypassing the brutal gauntlet of enemies as I travel down and then back up the mountain. Sadly, I soon learned that I could not skip this or I would miss out on the trophy for winning the game on the Lost in the Fog difficulty, making all my struggles up to this point for nothing. So I had to muddle through. And it was not nearly as bad as I expected. I managed to run past a couple of enemies and relying on my counter saw me through.
Time for another boss battle. (Credit: NeoBards Entertainment, Konami)
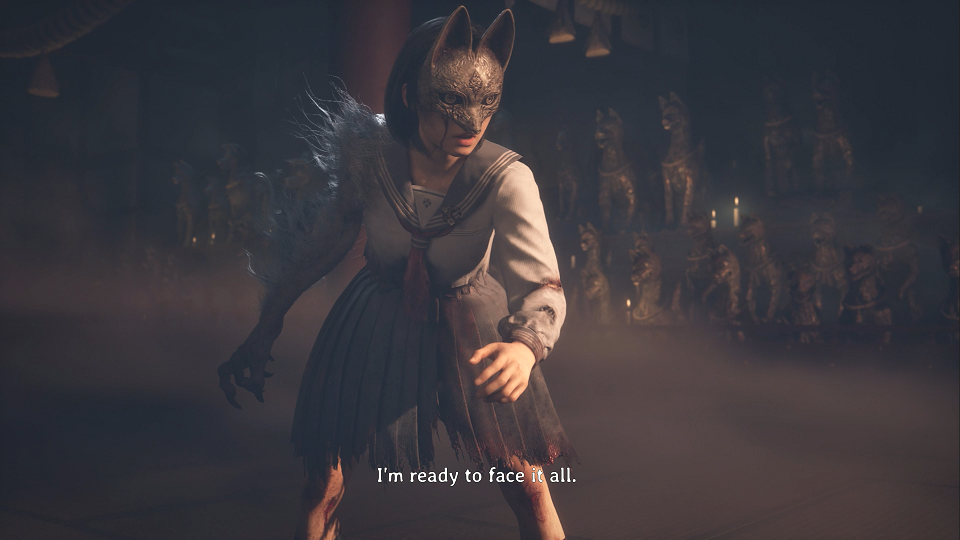
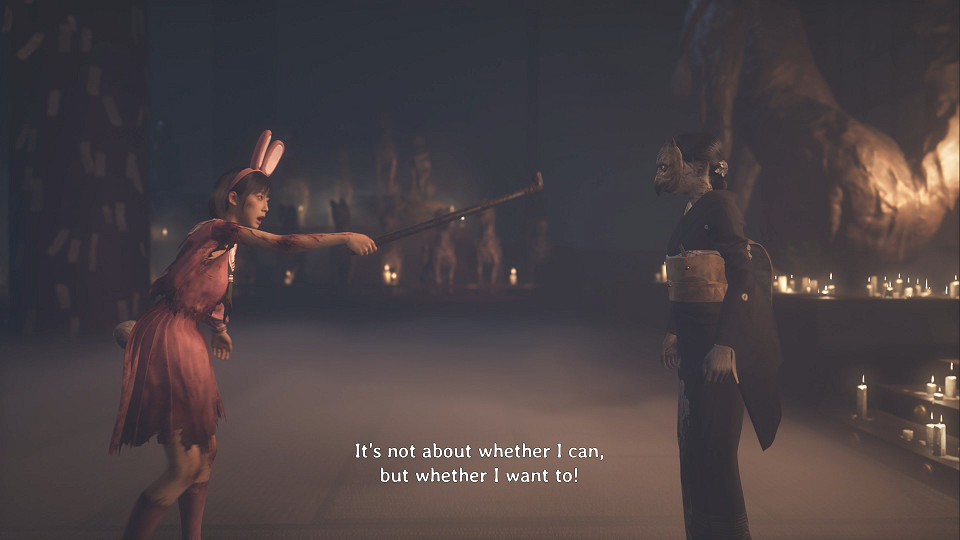
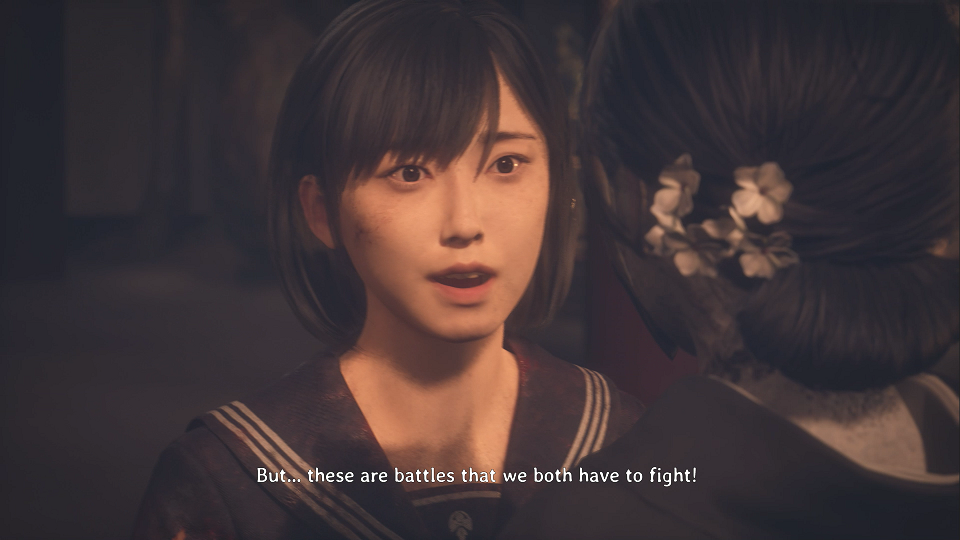
The next Dark Shrine area was easy and straightforward. I was able to build up my healing items for the new final boss. Stepping into the room, Junko is there as always, but the dialogue is different. Junko is still surprised to see Hinako there, but Hinako is stronger this time, shouting that she should be able to fight for what she wants. That she has the right to exist. Junko tells her it’s too late and touches her shoulder but freezes in place. This time the doll doesn’t materialize on Junko, but is clinging onto Hinako’s back. Hinako breaks down the altar like usual, and is interrupted by Dark Hinako, who declares she will have to kill Light Hinako.
This surprised me. (Credit: NeoBards Entertainment, Konami)
Surprisingly, you fight the Shiromuku again like in the first ending. However, this quickly turns out to be a clever fake out.
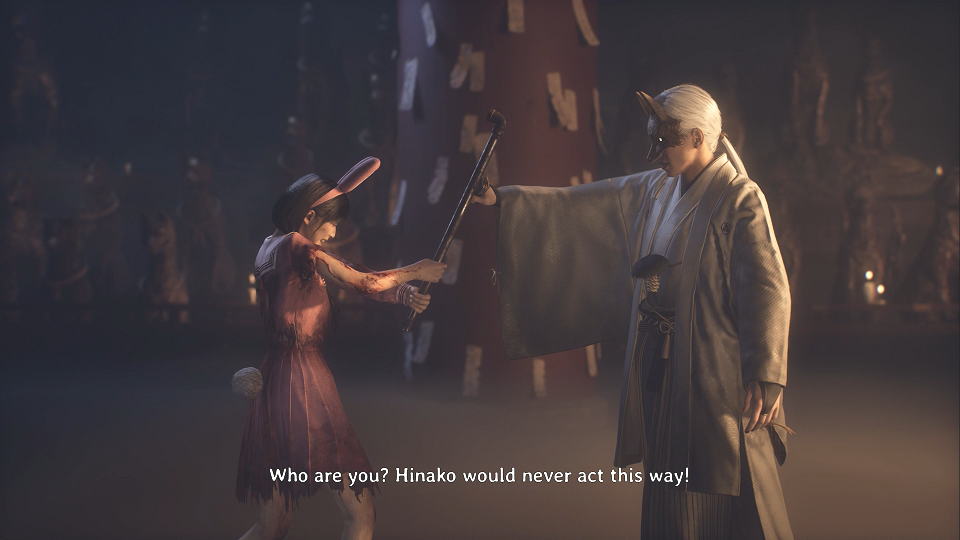
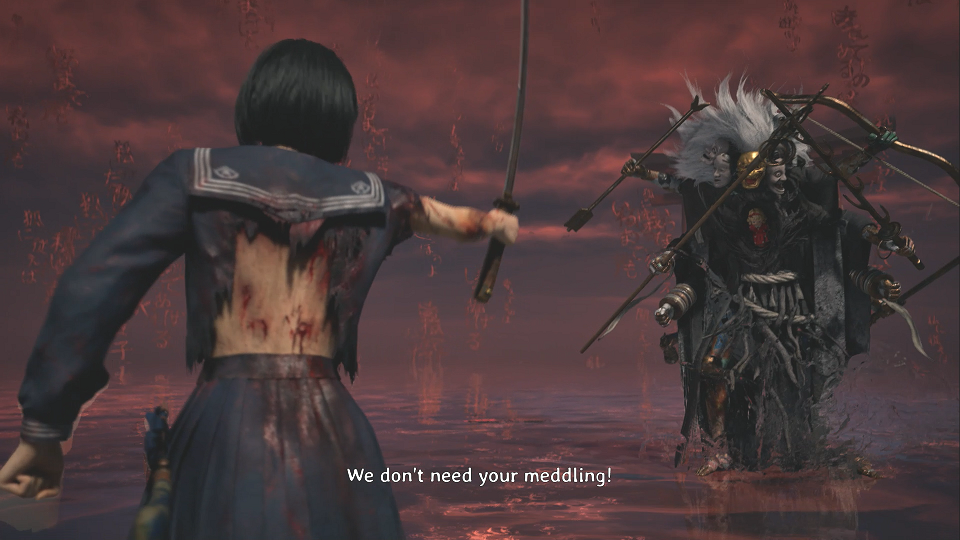
Dude, you don’t even know her. (Credit: NeoBards Entertainment, Konami)
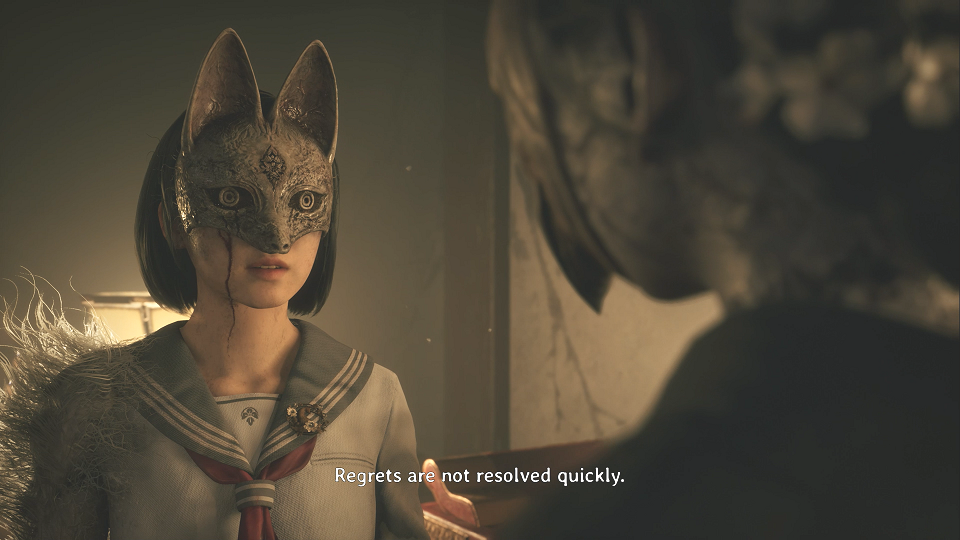
Shortly into the battle, Fox Mask interrupts, demanding to know who Hinako is. He says this is not behavior befitting a bride-to-be and that Hinako would never act like this. He asks her how she entered the scared grounds. Then he senses the doll, but it disappears before he can see it. While he’s distracted, Shu runs up and whacks Fox Mask with his bat. He tells Hinako that he always believed in her. He knew she’d find the strength to speak up and express her true feelings.
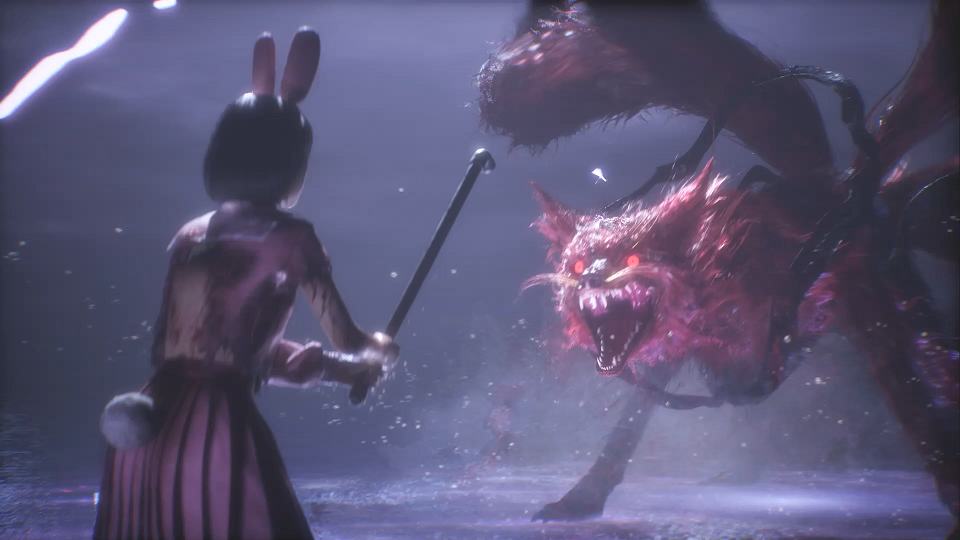
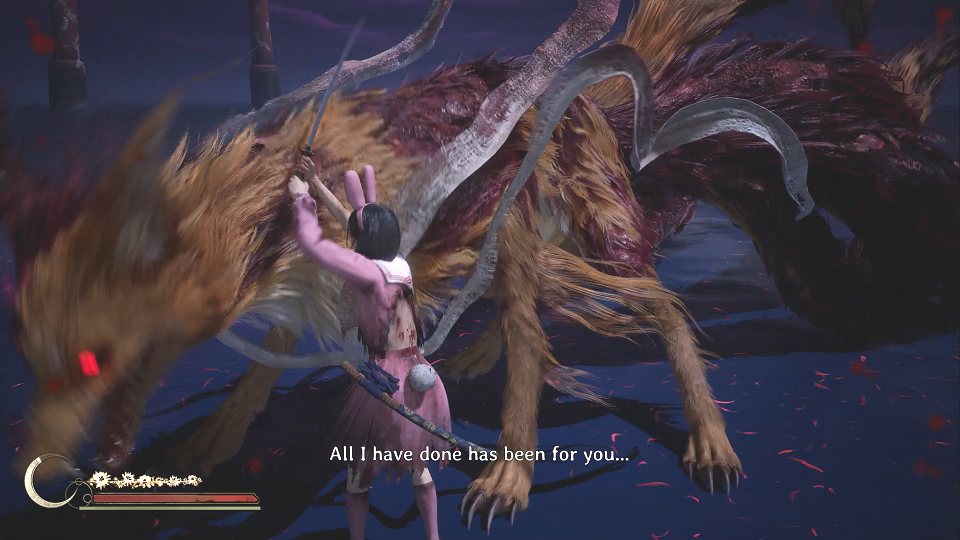
Aww, is a fox. (Credit: NeoBards Entertainment, Konami)
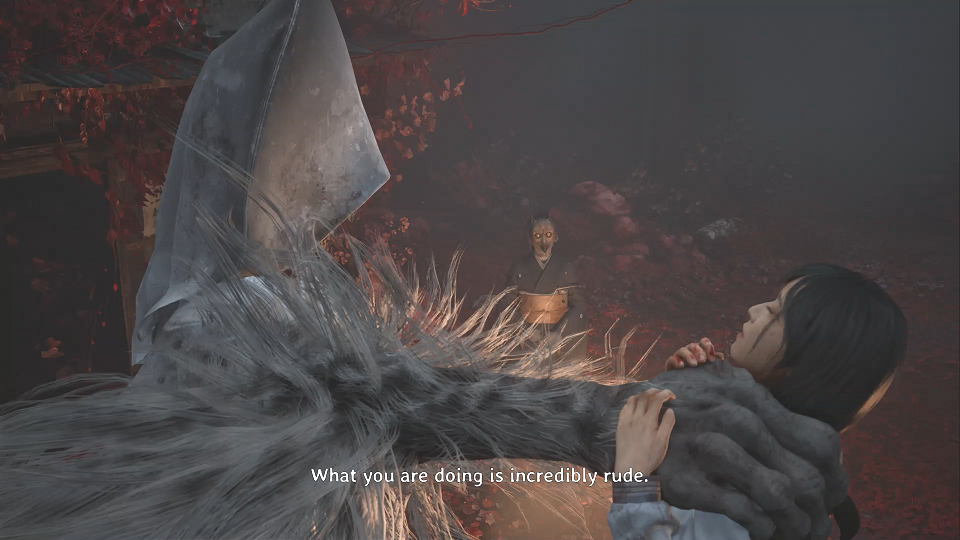
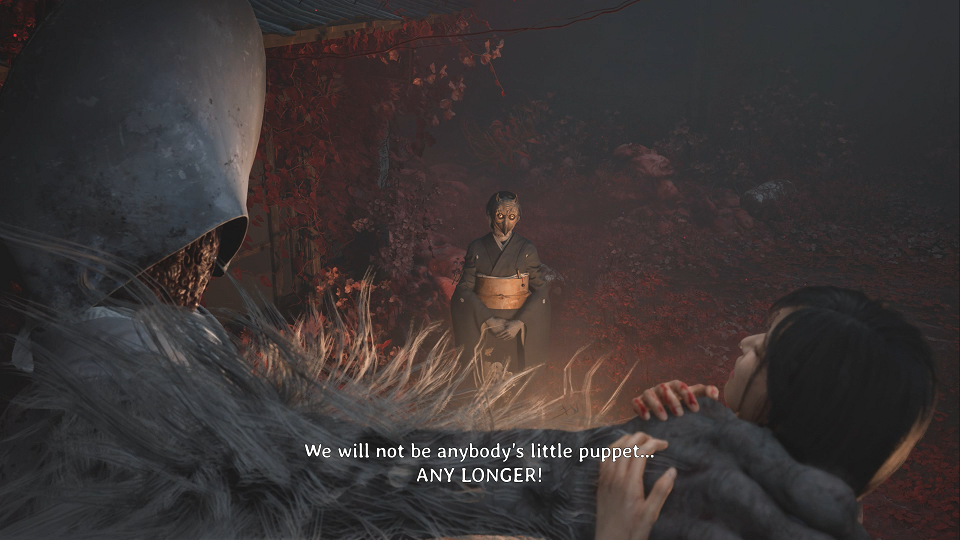
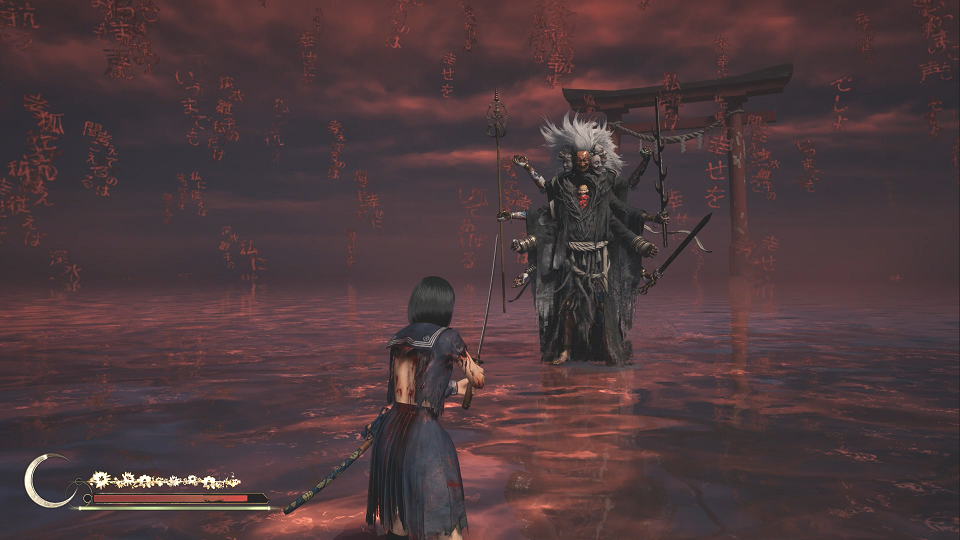
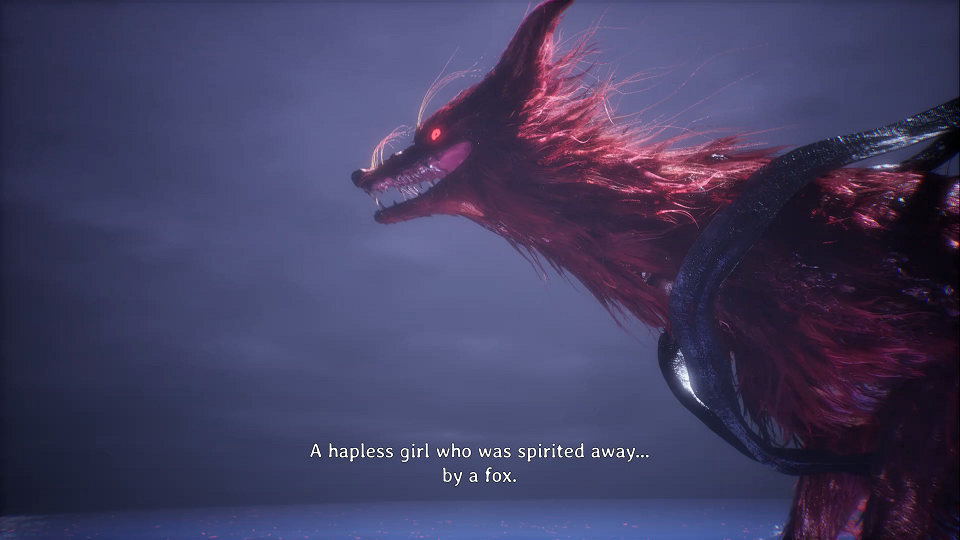
Fox Mask loses his normal composure and shouts at them, calling them filth. He starts to transform into a giant nine-tailed fox. Shu and Hinako try to run, but Fox Mask, now a giant yokai kitsune, knocks her to the ground. The monster is called Shichibi and he growls that he is just a man who fell in love and he will make Hinako his wife yet. He says that out of love and respect for her, he abided by the rules of human courtship, but now he risks losing her. He tells her to abandon the human world, fade from everyone’s memories, let the missing posters crumble to dust. She will be remembered only as a hapless girl who was spirited away by a fox.

Chop, chop. (Credit: NeoBards Entertainment, Konami)
Like most bosses, this one has multiple phases. Phase 1 against the Shichibi is pretty straightforward and I got it down pretty easily. He swipes, rushes at Hinako, and plunges his tails into the ground to create electricity and red tendrils that can damage you. He also has a rush move where he can knock Hinako to the ground and take most of her health away if she doesn’t dodge in time.
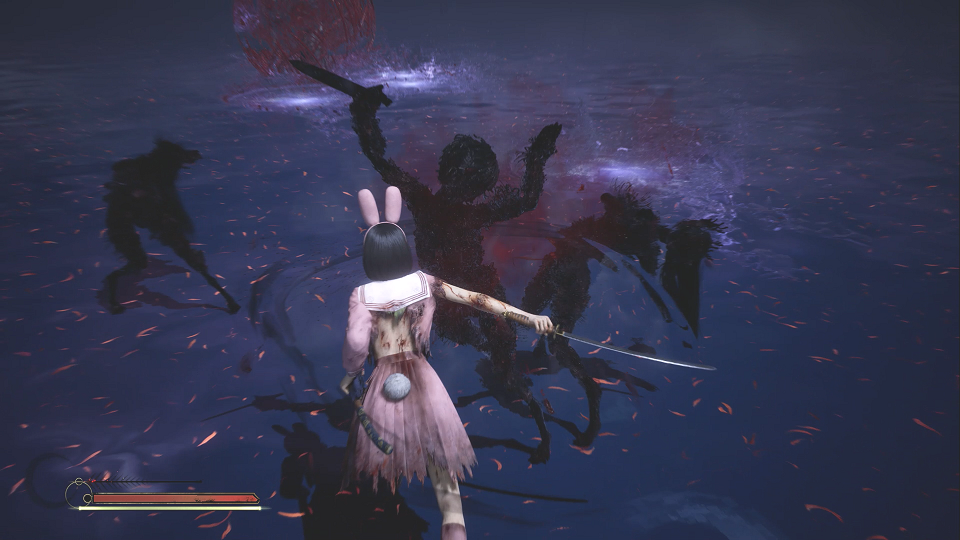
Shadow monsters. (Credit: NeoBards Entertainment, Konami)
When enough damage is done, the Shichibi turns back into Fox Mask and cocoons himself in red tendrils while shadow dolls come after Hinako. Thankfully, these only took one hit with the axe to bring down. (I had to switch to the axe to let my sword recover its durability.)
Going after her fiancé with an axe. (Credit: NeoBards Entertainment, Konami)
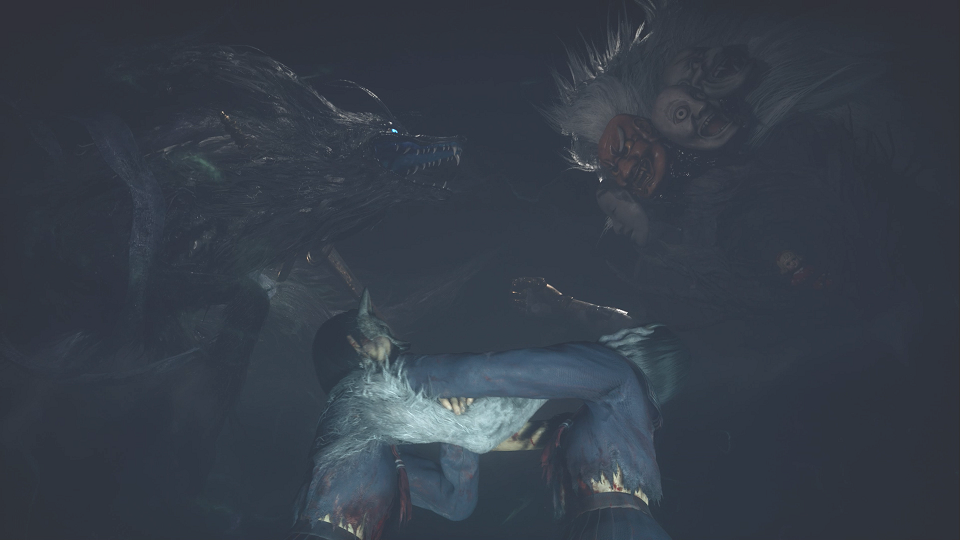
When the Shichibi emerges from its cocoon, the second phase begins. He has some lighter brown-colored fur among the red and is faster and meaner. He jumps around more and is harder to counter. He starts a move where he springs up on his tail and lands on Hinako. I had a lot of trouble dodging this move. After doing enough damage, he again cocoons himself, but this time you have to fight shadow beast monsters. These took more than one swing from the axe and I ended up dying to them a couple of times.
Almost got him. (Credit: NeoBards Entertainment, Konami)
In the third phase the brown fur is increased and he does mostly what he did in the second phase, but also swings his tail around a lot. This time when he cocoons himself, you have to fight two of the father monsters at once. (A total of three of them.) After defeating them, the battle ends.
The Shichibi boss was the most difficult portion of the game for me so far, made that much more difficult because I was playing on the hardest difficulty. I basically had to learn how to fight the boss all over again for each phase. Some moves consistently gave me trouble, but mostly I just had to learn how best to evade and counter. The tail move seemed impossible to consistently dodge. Sometimes doing the same thing twice would give different results. The sword really helped me here, but I do wish I had brought some faster weapons instead of just three axes. Some of the monster mobs were tough to counter and the axe is slow.
Eventually, though, I managed to get it down and won. I was just about to quit for the night and try again the next day when I managed to win. I’m glad I stuck with it. But it did end up taking about two hours all told to beat this one boss.
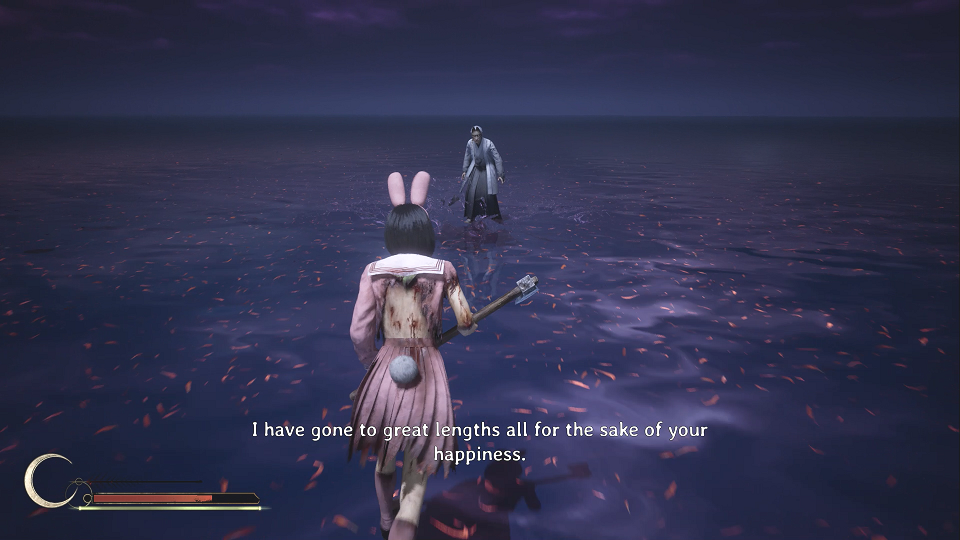
As a side note, I’m very glad that I recorded portions of this fight for the screenshots. It was very hard to read the subtitled dialogue while battling the boss. And I was too stressed out to pause and take notes as I was going. Throughout the fight, the Shichibi tells her that he’s worked hard to make her happy and that she doesn’t understand how he feels, that she can’t learn. Basically he’s trying to foxsplain it all to her. In the final leg of the battle, Hinako finally gets through to him. She explains that while he’s devoted his entire life to making her happy, she has decided to live her own life. Happiness should be something she decides, not something given to her. He tells her a baby bird needs to learn to fly. She tells him that she has to learn to fly on her own.
Now that I kicked his ass he’s being reasonable. (Credit: NeoBards Entertainment, Konami)
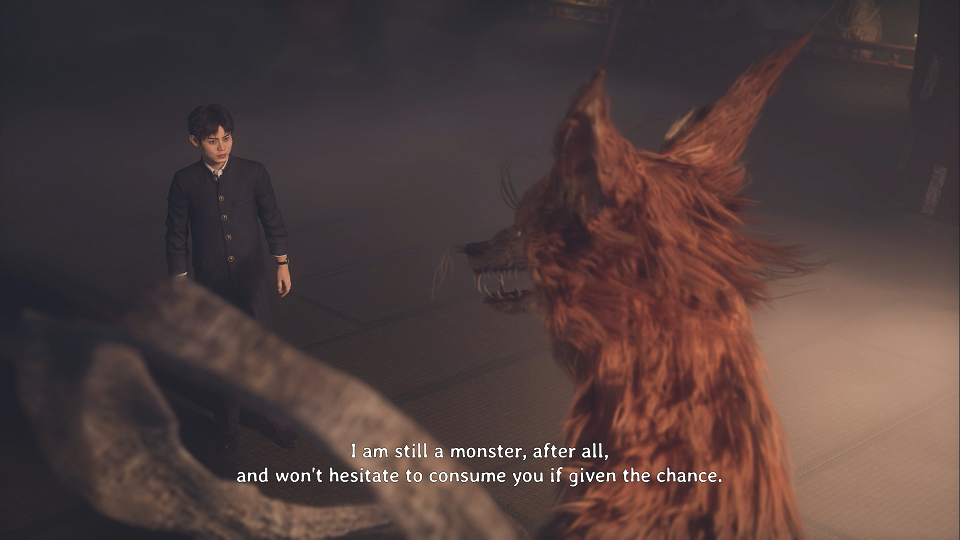
The Shichibi falls, thanking Hinako for staying with him until the end. He is all brown-colored now. She thanks him, saying that she’ll always remember his kindness. Shu returns, imploring her to run. Shichibi tells them to leave, that he will handle things here. Shu says that he remembers playing Space Wars with Kotoyuki when they were kids, so that makes him one of their comrades. Shichibi replies that they need to leave. He is still a monster, after all, and will eat them if given the chance. Shu leaves, calling him a comrade, and Shichibi accepts Shu as a gallant man.
Reunited. (Credit: NeoBards Entertainment, Konami)
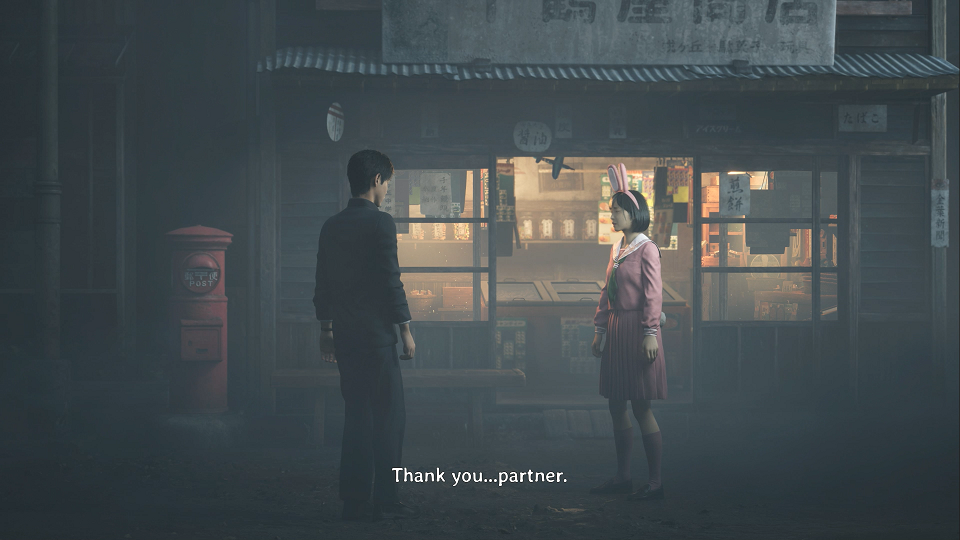
In the mid credits scene, Hinako and Shu run through the Dark Shrine during the daytime, finding themselves back in Ebisugaoka. Hinako thanks Shu for coming for her. Without his help, she says, she wouldn’t have been brave enough on her own. He shrugs this off, saying that he was only able to help because of her courage. She laments that it took her too long to find that courage. She caused everyone so much trouble. Shu says that it’s crazy she thought the only way she could find her courage was to give up on her life. She thanks him, calling him partner again and he turns away, embarrassed. As they walk off into the fog together, she comments that he looks weird in a tie. He tells her to shut up.
The scene fades to a radio broadcast, where the announcer is saying that the geysers have increased over the last three weeks and the resulting hydrogen sulfide gas has caused the government to order the residents of Ebisugaoka to evacuate. The doll is leaning up against the radio. So it seems the fox god was defeated, but perhaps the water dragon has reawakened?
Final ending. (Credit: NeoBards Entertainment, Konami)
And now we come to my fifth playthrough. After thinking it over for a while, I chose to go back to the standard navy uniform for this one to bring it full circle. I also reverted to the default difficulties of Story/Story.
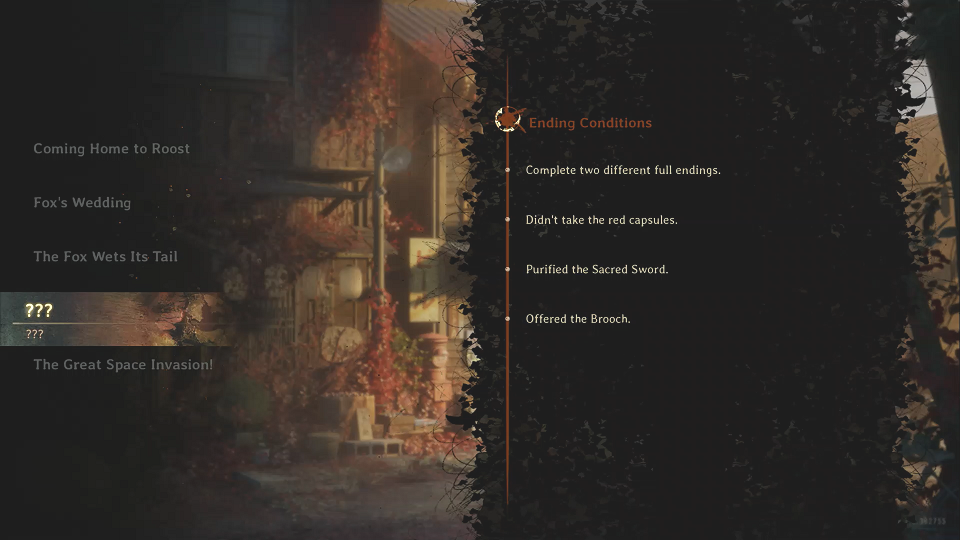
This is considered the “true” ending of the game, which is why I left it for last. The requirements for this ending are to attain any two of the first three endings on your save slot. Again, do not take any red capsules. Find and purify the Sacred Sword. And offer the brooch as tribute to the hidden Ancient Jizo Statue.
So, taking this into consideration, not much is different in the game until the point where you purify the Sacred Sword. So this section will be much quicker.

This tree’s looking at me. (Credit: NeoBards Entertainment, Konami)
I took my time with this playthrough and actually looked up locations of documents and Emas. I was missing two documents, two Omamori, and my last three Ema for the Sanity upgrades. Stepping the difficulty down from Lost in the Fog to Story was significant and I raced through the game. I wasn’t afraid of any monster and spent most of the run full up on healing items that I didn’t need to use but wanted to save for the end.
Back in the garden. (Credit: NeoBards Entertainment, Konami)
Finally it was time to purify the Sacred Sword. There was a simple puzzle to solve involving bells in the hidden Shrine garden. Then the water turned red as blood.
I nerfed my sword. (Credit: NeoBards Entertainment, Konami)
After the battle with Rinko I just had to go back to the old burned-down shrine to purify the sword. Sadly, once I did this, the sword was less powerful and no longer regained its durability while sheathed. I swapped out one of my Omamori for the one that recovers your extra weapons and I was set. The biggest issue is that it no longer had the massive reach it used to, so that took some getting used to.
Giving up the brooch. (Credit: NeoBards Entertainment, Konami)
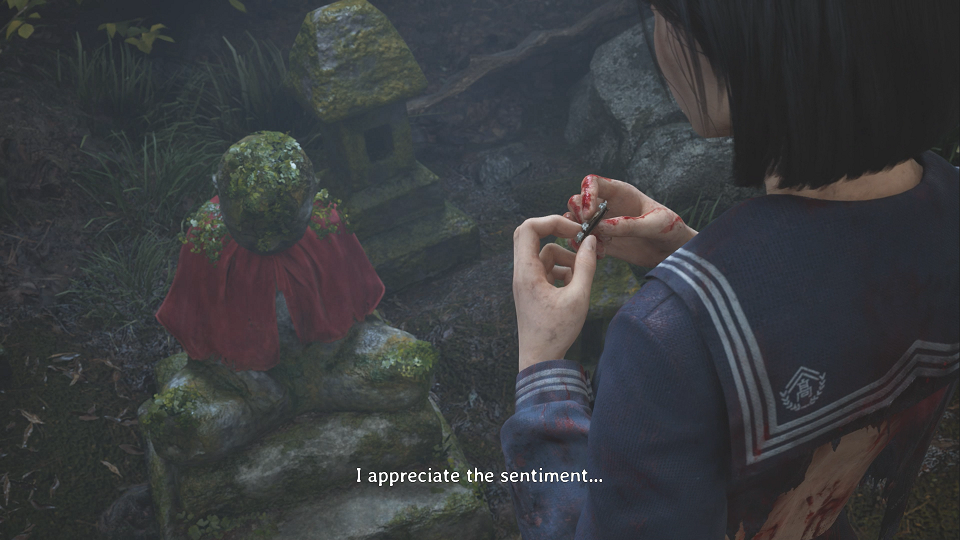
Before entering Hinako’s house I took a bit of a side quest to find two Ema. I also met the last requirement for the final ending: I sacrificed the brooch at the ancient Jizo statue. (Which, while needed for the ending, locked me out of my last Ema, which was behind a sealed door you need to brooch to open. Oops.)
A new memory. (Credit: NeoBards Entertainment, Konami)
Once entering the Shimizu Residence, I was officially in New Game++. This visit to the house focused on Hinako’s relationship with her family. I found a surprisingly sweet letter from her father to her mother. The first flashback featured a new conversation with Junko. Junko opens up to her sister about her own arranged marriage and how she felt it was her duty to help her family out. Hinako explains that she doesn’t think she could be happy with all the things everyone tells her should make her happy— a husband, kids, financial security. She believes making your own decisions is more important than happiness. Junko says that although she doesn’t agree, she understands Hinako’s point of view. She hopes that some day, in a hundred years or even within her own lifetime, maybe she could be free to choose her own path.
Why is Junko being so nice? Because this is the second of two scenes where we see Hinako’s real sister, not the monster she became in Hinako’s mind.
Related side note: Around here I noticed a new journal entry about Junko that detailed going to see her in the hospital while giving birth. She didn’t look like her sister anymore. I found this very intriguing, since there was no other reference to Junko being pregnant or Hinako having a niece or nephew. But this does seem to be the origin of the pregnant monster that spawns other monsters.

This one isn’t a memory. (Credit: NeoBards Entertainment, Konami)
In Hinako’s parent’s room, she runs into her mother… not a hazy ghostly memory, but her actual mother. This was a very interesting conversation. Kimie explains that Hinako’s father is not as cold and cruel as he seems. When it’s just the two of them he can be very sweet and kind. She explains that he believes it would be wrong to show any weakness to his daughters, which is why he is so hard on them. She also explains that their financial predicament is not due to bad investments, as Hinako had been told. Her father was planning to open a shop with his best friend. But that friend took all his money and vanished, leaving her father destitute and heartbroken.
She also explains that she knows Hinako sees her as weak and that she never stands up to her husband, but she does, when they’re alone. Just never in front of her and Junko. (Pride is the most important thing to a man, she says.) She explains that a woman is the one with the power in a marriage and that she used silent treatment and passive aggressive tactics to break her husband down to get apologies. Making food he doesn’t like, wringing dirty rags into his tea, stuff like that. On one hand, it’s a sad way to look at things, on the other it’s good to see that Kimie has more will than she lets on. She apologizes for making Hinako worry. They embrace and her mother vanishes.
Later on, Hinako finds a letter to her father from her uncle. It references Kimie’s health problems and urges Kanta to not pay for the surgery. Kimie wouldn’t want him to spend all that money and would rather they spend their remaining time together happy. There were previous references to her being sick, so this contributed to their debt. It also explains the extensive medicine list that we found on a previous run.

This would be a real concern with this guy. (Credit: NeoBards Entertainment, Konami)
Upon reaching Hinako’s room, she comes across Dark Hinako like usual. But this time her father— hazy like a memory, but more real than most of the flashbacks— comes in to apologize for being a terrible father. Both Hinakos are shocked by this. He bows low and apologizes for being cruel and scaring her. He believed incorrectly that a proper father should be feared by his children. Dark Hinako refuses to hear it, telling him that he’s only apologizing so that he will feel better, and that it doesn’t erase what he did. She tells him to get out of her life. Light Hinako suggests she at least hear him out. As her mother said, he was suffering and he is family after all, like it or not. She doesn’t have to forgive him, but she should at least let him speak from his heart. Dark Hinako still refuses. Light Hinako points out that they’re tied to him by blood. Mother is only tied by marriage, and she found the courage to forgive him. He may not deserve forgiveness, but listening to him is for her sake as much as it is for his.
Kanta goes on to say that if his actions taught her to fear all men, then he was wrong. But not all men are hopeless fathers. He tells the Hinakos that Kotoyuki is an upstanding, good man who can make her happy. He believes Shu is a respectable man as well. He reveals that he always thought she and Shu would be happy together. But what he thinks isn’t important. He tells her that it’s ultimately her choice whether or not she gets married. He will support her choice. He finishes by saying that he doesn’t expect her to forgive him, but wants her to be free of his curse and to be happy. Hinako says she’s still scared, and she doesn’t forgive him. When she says this, she’s alone again.
The conversations with Junko and Kanta may have really happened, since they were hazy like all the flashbacks. But Kimie appeared as real and clear. They all appeared to be having conversations with Hinako that they never had in real life... or it could be that before she never acknowledged what they were saying, never truly listened. This represented her coming to terms with her parents and what they’re actually like. I was disappointed— but not surprised— to see that the following scenes and boss battle with her parents were unchanged from these revelations. I suppose she still had to defeat the corrupted versions of them— her traumatic feelings of them— to continue her healing. I did rip them apart in record time, though.
Also note that one of the missing Omamori was in a secret passage at this point. After solving one of the puzzles, a new hallway opens up leading to a new room. None of this is on the map. I never would have found it without looking it up.
More new dialogue. (Credit: NeoBards Entertainment, Konami)
The conversation at the midpoint of the gauntlet did change a bit. It was a continuation of the conversation she had with Junko about happiness and making your own choices. Everything after was the same, up to encountering the doll in Dark Shrine. Hinako asks the doll, “Who are you? Why are you trying to control me?“
She’s learned a lot. (Credit: NeoBards Entertainment, Konami)
So going into the final room, I had way over-prepared. I had 9 bandages, 3 Yokan, 8 first aid kits and 6 tool kits. Since I was on Story Mode, I certainly didn’t need that much, but I barely used it during my playthrough, so I ended up hoarding it.
Anyway, Hinako enters and approaches Junko as usual. This time Junko realizes she’s Hinako, instead of treating her like an invading spirit. Hinako tells her that someone is toying with them. One wants to marry her off and the other wants to stop the wedding. They’ve been making her fight against herself. She says that someone is always trying to force them, pressure them, but she sees they’re all in the same position. Junko doesn’t respond. She turns away. Hinako apologizes to everyone and says that if they truly want her to be happy, this is something she has to do. As always, she breaks up the altar and the offerings.
“Why are you choking yourself?“ (Credit: NeoBards Entertainment, Konami)
Dark Hinako comes in and asks why they should have to fight to the death for one of them to survive. They decide mutually to not fight each other anymore. But their arms move on their own and they start strangling each other. Above them, the male Inari god (Kyubi) and the female Inari god (Tsukumogami) manifest and speak. They taunt each other about the eons that their resentment has festered. As we learned in various documents, the female god was originally named Inari and was represented by the ancient tree. This god fell out of favor and was replaced by the fox god who took her name. The original god was forgotten and grew resentful over generations of neglect.
Fox Mask comes in and asks Hinako what’s going on. He sees the angry gods and uses his dispelling power to separate the Hinakos. Kotoyuki falls from the backlash, losing his mask. His eyes light up with a ghostly glow and he speaks with the fox god’s voice, saying that every blue moon an extraordinary girl is born. A spell is placed on the clan’s successor, compelling him to do everything in his power to marry her. Kyubi strides in, saying that usually they can use their cunning, but this generation’s heir is an inexperienced fool. Dark Hinako kneels by him and says that all he wanted was for them to be married and he tried so hard. Kyubi laughs through his fox form and through Kotoyuki, enraging Hinako. She demands he stop laughing. A monster could never understand what Kotoyuki’s been through.
Hey, another fox! (Credit: NeoBards Entertainment, Konami)
The boss battle begins. Kyubi looks and acts much like Shichibi, but he’s all black and is much more reserved. He spends much of the battle sizing Hinako up, circling her, jumping back, gauging the right moment to attack. (Of course, this could be because I was on Story difficulty. I’m sure he’s more aggressive on the higher difficulties.) Another big difference is that he can summon his shadow monsters at any time and doesn’t cocoon himself to do it. So you have to deal with the shadows and the fox at the same time.
During this fight, Hinako talks about Kotoyuki’s feelings and his devotion for her.
This guy again. (Credit: NeoBards Entertainment, Konami)
After doing enough damage, you flip into the reflection in the floor and you’re Light Hinako battling the Tsukumogami. This version acts like the version that possessed Shu, except that without Shu paralyzing it now and then, you have to keep fighting it. Interestingly enough, this version wears all black and is piloted by Hinako’s doll, proving the connection between the female deity and the doll.
During this fight, Hinako talks about how society tells women that they can only be happy with the love of a man, but she doesn’t see how this could make her happy at all. She needs to spread her wings and think over her life without the interruptions of deities.
You tell her, Hinako! (Credit: NeoBards Entertainment, Konami)
Again, after enough damage, the scene flips and you battle Kyubi. Each side of the boss battle has three phases. When the battle ends, the doll falls to the floor, purged of its possession. The shrine begins to quake.
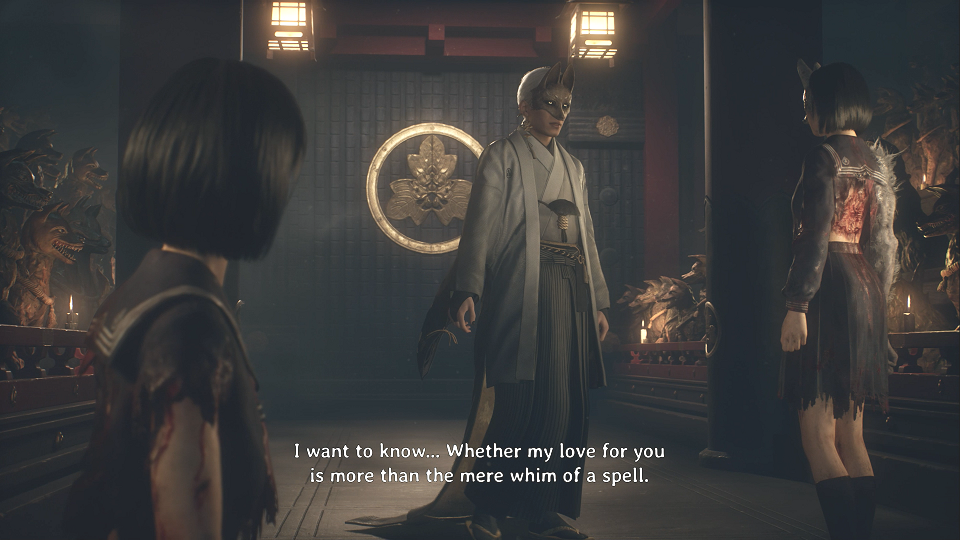
The spell is broken. (Credit: NeoBards Entertainment, Konami)
Kotoyuki rushes to their aid, escorting them to the hallway. He claims that the fox god just had too much too drink and he’s normally kind. He tells them that he will handle it and that he needs to know if his love was true or a spell as Inari claimed. Hinako says that if it was true, she hopes they can meet again. She says they will think it over carefully as well and be ready with their answer. He puts his arms around them and the scene fades to white.
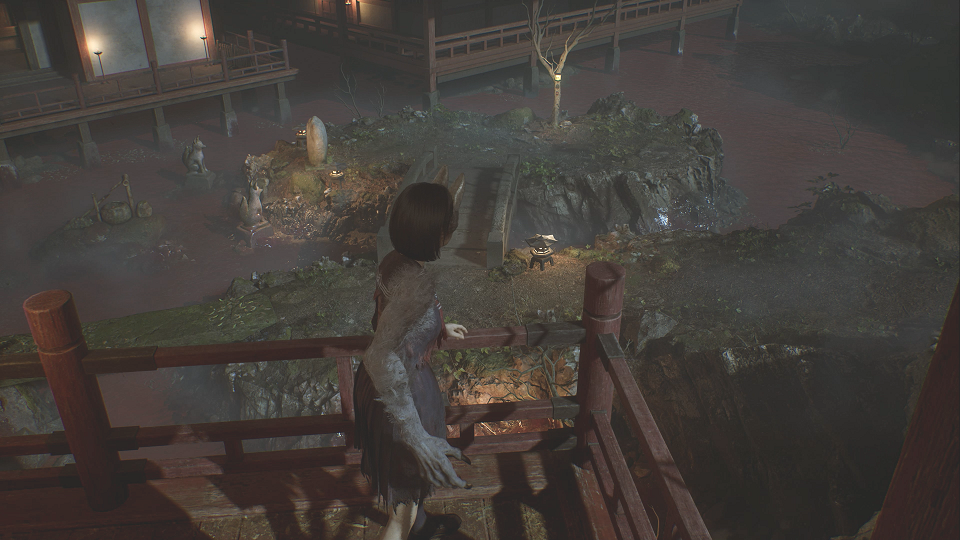
Back home again. (Credit: NeoBards Entertainment, Konami)
Hinako finds herself alone outside the shrine overlooking Ebisugaoka. It’s foggy out and appears to be either dawn or dusk. The credits roll.
In the mid credits scene, you receive a letter from Kotoyuki, where he tells about his journey of self discovery. He bought cheap treats at a candy store and ate them with some children. He feels he’s having the childhood he never had. (His mother was strict, wanting him to claim leadership of the clan.) Once he’s healed his inner child, he plans to reevaluate his feelings for her.
The two Hinakos read the letter together. Dark Hinako’s uniform is clean and mended. She no longer has the fox mask, but she does have the fox arm and Kotoyuki’s brooch. The two of them talk about their futures. They both want to put their whole hearts into something, as Kotoyuki did for them. Dark Hinako wants to have such passion that she could one day propose to Kotoyuki… when she’s ready. Light Hinako also wants that passion, but isn’t sure what she will use it for yet.
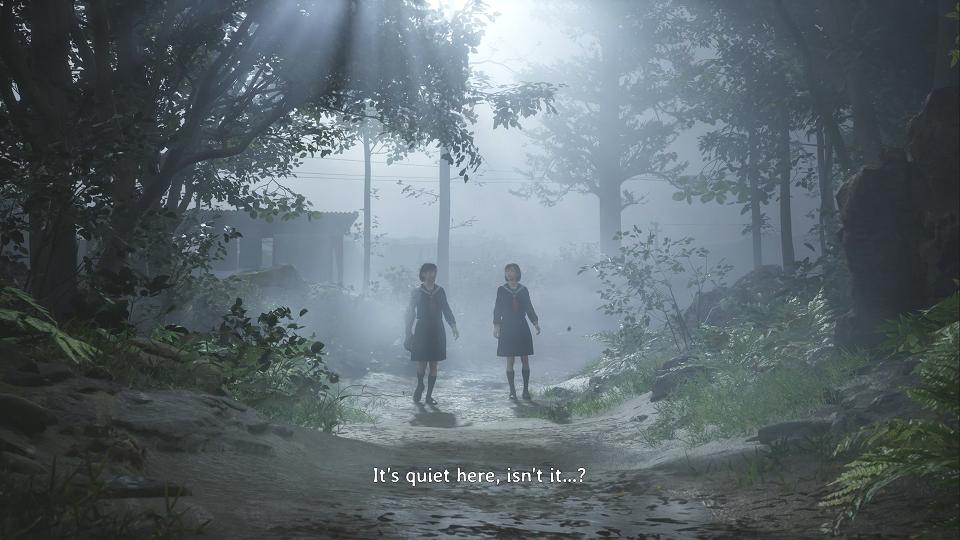
The two of them walk through a silent and empty Ebisugaoka, ending up on top of the shrine’s Torii, overlooking the town. They agree that it’s nice being there, just the two of them, no one to bother them or tell them what to do. They smile at each other, enjoying the quiet together. The scene pans over the town, showing it is indeed empty, and filled with fog. It’s also been flooded. Just before the scene fades out, we see Junko’s bell (the one Hinako gave her in the opening scene) hanging from a branch. It gives out a chime.
She needs to clean her room. (Credit: NeoBards Entertainment, Konami)
So that was Silent Hill f! I ended up playing the game five times over the course of roughly five months to get all the different endings. As I was wrapping up the writing of this post, I completed one final play through. This one was a speed run on Casual difficulty to get the rest of the trophies and last Ema and Omamori I missed. To make it easier, I saved the game just before the Shimizu Residence so that I could get both ending 2 and 4 without replaying everything. I just figured I was so close on the trophies and the game was still fresh in my mind, so I might as well rush through and platinum it. I finished the final ending with 50 of 57 trophies and now I have them all!
Giving Shojo manga vibes. (Credit: NeoBards Entertainment, Konami)
So let’s talk about the endings. While the UFO ending is just for fun, the other endings give us a lot more of the story. Light Hinako can be seen as Hinako’s external self, struggling with her human problems and her forced role in society. While Dark Hinako can be her inner self… her strength, or possibly her weakness, going along with what’s expected of her. This inner self is her trauma, lashing out at the lighter side, feeling only one of them can survive.
The first ending shows Hinako defeating her fox persona, fleeing from her wedding and lashing out at anyone in her way. A very bleak ending showing her dependence on the red capsules and snapping under the pressure she was under. Ending 2 shows the Fox Hinako defeating her humanity, killing who she once was and throwing herself into the role of bride. Leaving what remained of her free self as a torn off face begging for release… yet another mask. The third ending shows Hinako finding the courage to stand up for herself and take her own path in pretty much the reverse of the 2nd ending. She leaves Kotoyuki and the wedding behind to continue being Shu’s partner. The 4th ending shows Hinako coming to terms with both facets of her personality, waking up Kotoyuki, and breaking free of the influence of the gods. She finally finds peace within herself and the world.
Taking a stroll. (Credit: NeoBards Entertainment, Konami)
So what the heck did the fourth ending mean? It’s open to interpretation. It’s referred to as the “good” ending or the “true” ending. While it’s as open to interpretation as any Silent Hill ending, two things are clear. One, Hinako has found peace with herself and is finally free of the pressure and strife she dealt with. Two, the dam has broken and the geysers flooded the town with both water and poisonous gas. Just as in the radio report on Ending 3, the town has been evacuated. But Hinako appears to have stayed behind.
This could mean that she’s dead, possibly in some sort of afterlife. The appearance of Junko’s bell makes me wonder… why would that be there, except perhaps to show that Junko is looking over her? (I still wonder if she died in childbirth.) They were shown walking through the town, unaffected by the gas. They got a letter from Kotoyuki, so if they are in the afterlife, they’re in the same one as him. Or it could mean that the defeat of the gods granted them the power to survive in the abandoned town. Of course, it could be that the gas is just fog. It’s hard to say.
Regardless of Hinako’s fate, I’m certain that the endings are pointing to the idea that everyone else in town have evacuated due to the flooding. Hinako stayed behind to work out her issues. The missing poster you find near the end of the game indicates she’s been gone for a while. (Although this could be in her head too.) This really brings me to the biggest takeaway from these endings, which I suspected from the start. While she’s manifested her home town, her friends, family, and betrothed, this is all happening in Hinako’s head. The story of the game is a complex therapy session for Hinako as she tries to decide what path to take in her life. If she did end up poisoned by the gas or drowned in the flood, that just makes for an extra layer of tragedy to end everything on.
So is she alive or dead? Were there actually monsters, or was she just fighting a series of metaphors for her trauma? This is Silent Hill… it won’t tell us for sure. We have to come to that conclusion ourselves. I want to believe both Hinakos made it out. Kotoyuki too. They all deserve a chance to figure out where their passion and happiness lies.
Whatever the meaning behind the ending, whatever their fate was, this ending showed them both happy. Hinako was smiling genuinely and even laughing. The fox Hinako regained her face, even though her arm was still replaced. The blood and torn clothes that showed the markers of their difficult journey were cleaned away, leaving them both looking untouched. They got through it intact and stronger, finally at peace. So, alive or dead, it’s a happy ending. (Silent Hill style.)
Hmm… (Credit: NeoBards Entertainment, Konami)
In my first post I talked about the game itself and what I was able to interpret of the story from the first playthrough. So what did all these additional playthroughs tell me about the story? Quite a lot actually. For one thing, the game states that Hinako means “baby bird” and there is a lot of bird imagery in the game. Several of the trophies refer to birds, Junko wears a bird mask, there’s a door marked with bird symbols in the Shimizu house. The conversation with Dark Hinako in New Game+ relates to birds leaving the nest and her demands for Light Hinako’s wings. The bird imagery is pretty easy to parse, relating to her transformation and journey to strength and having control over her life. (Leaving the nest, spreading her wings, learning to fly.)
As mentioned earlier, I started to wonder on my second playthrough about the origins of Fogworld. (Remember that the game is divided between Fogworld and Dark Shrine.) In Silent Hill 2 we saw that the town became a personal hell for each character. I wondered early on if that was the case with this game as well… if Hinako was in a type of purgatory where the only beings she meets are her friends and family and their words, actions, and feelings are all how Hinako perceives them. Some of the documents on my second playthrough made me question this, however. We learned that Rinko wished for a world in which she and Shu could be together and be the main characters, which explains why she stuck so closely to him. She did mention that she didn’t want everyone to vanish, though… she needed an audience to see how happy they were together. (The fourth ending would be her real hell.) Sakuko wanted for everyone to honor the old gods and go back to visiting her family’s old shrine. A world of monsters would certainly fit that bill. Shu didn’t have anything like that, but it was clear he wanted things to stay the same forever and to continue being partners with Hinako. This allowed the forgotten god to possess him, transforming him into the Tsukumogami. So, taking that into consideration, I wondered if they were all changing the world to suit their wishes.
Side note, I never fully understood Shu’s treasured possessions. While he always showed himself to care deeply for Hinako and support her in everything, this area showed another side… a cruel side, bitter and belittling towards her. This could be a manifestation of resentment over repressed love for her, since he clearly has romantic feelings that he’s not expressing. However, when confronting him after getting the possessions back, he was as congenial as ever, understanding why she was killing him and accepting his death. The nearest I can figure is that in this area of the game Hinako was taking everything she thought her friends felt towards her and blowing them out of proportion. (Like in my purgatory theory.) She was doing this to make it easier to discard them, to say goodbye and “kill" her past”. The friends she killed were not actually there, they— and everything else— was in her mind during her spiritual journey. Where were her actual friends? Probably already evacuated, as I discussed in the ending section. This didn’t mean that their emptions, needs, and wants didn’t already affect the formation of Fogworld.
This fox is a jerk. (Credit: NeoBards Entertainment, Konami)
I talked a bit in the first post about the traditions of the area but in subsequent runs I learned a lot more about the lore. For one thing, there are older gods than the fox god. He’s actually, relatively speaking, a new god for the people. The original (?) god is angry about falling out of favor. There was also a lot of talk about the defeat of a great water dragon and one of its heads was laid to rest, sealed beneath Ebisugaoka. All of this lore may or may not be true, but it still impacts the story because Hinako was brought up hearing these stories and was effected by those who believe. If you grow up hearing stories about a fox god spiriting girls away forever, on some level you internalize that and it effects you in ways you may not realize.
I posed the question earlier if Fox Mask was actually Kotoyuki possessed by Inari-sama. After seeing all the endings, I’m sure this is the case. It seems the fox that bit him as a child, who Hinako saved, may have been a physical incarnation of Inari-sama. The god possessed Kotoyuki in order to spirit Hinako away. Some documents suggest she was intended to become a sacrifice. In one of the new scenes, Fox Mask mentioned Hinako having saved his life. This could refer to either the boy suffering from the fox bite, or the fox in danger of being hunted by the townspeople. Regardless, the final ending shows that the real man is still in there and it was possible for him to escape Inari’s influence and choose his own path. Which may or may not lead back to Hinako at the end.
The fact that he refused to take off his mask could be representative of his possession, but also how Hinako sees men. They wear masks to hide who they truly are inside. (Like her father wanting his daughters to see him as cold and cruel.) The only times he removed his mask were when Hinako was unconscious, and in Ending 2 where he was married and could finally show his true face. When his mask was forcefully removed before the boss battle in New Game++, he spoke with Inari’s voice, not his own. Once the gods were defeated, he was back to wearing his mask even though he was free of Inari’s control.
It’s certainly not lava. (Credit: NeoBards Entertainment, Konami)
Also, I noted that Fox Mask was very dismissive of everything Hinako was going through in her shrine trials. This is partly due to a god’s perspective on humans, not understanding why these sorts of things would harm her fragile mortal body and mind. But it’s also due to the male perspective of being unable to empathize with what a female has to deal with and overcome in their lives. (Which very much fits the themes of strict old-fashioned gender roles portrayed throughout the game.)
Fox Mask refused to ever call Hinako by her full name. He only refers to her as Hinako. Since she was in the process of marrying him, she lost her surname. Yet she continually reminded herself that she’s not just Hinako… she’s Shimizu Hinako. This is her way of desperately clinging onto her identity, refusing to lose herself in marriage. When Dark Hinako gives this up, calling herself only Hinako, it’s representative of her accepting the marriage and the changes that come with it. Along with that she loses her voice and her face. (Note that when Fog Mask took his mask off during Ending 2, it was after his bride had given up her face and surname.)
Why are there two Hinakos? In her diary, she wished that she could split herself in two. One could fulfill her obligation to her family and get married, while the other could continue being an ordinary girl with her friends and her partner Shu. The red capsules Shu gave her facilitated this split— he even met a second Shu in his clinical testing— but Hinako was always a bit bipolar. When she was a young girl, she used to imagine there were two of her and she had to share her dolls with this other Hinako. This second Hinako may have been represented by the doll that kept appearing throughout her travels. The doll also could be seen as a metaphor for her childhood, but Junko and Fox Mask do sense the doll as though it were an intrusive spirit. On the final ending, we learned the doll was inhabited by the original Inari, the Divine Tree, so the nameless doll likely has multiple meanings.
This was an interesting scene. (Credit: NeoBards Entertainment, Konami)
A big part of the game was Hinako’s relationship with her family. Junko may have been her protective older sister, but she remained faceless throughout the game, because Hinako believes you give up your identity when you marry. As such, Junko mainly serves an antagonistic role in the game, coldly and without emotion, pushing her sister to fulfill her familial duties regardless of her wishes. (Although she did drop the ladder for her to escape the fog monster at the start of the game, encouraging her to not give up. Was this an act of kindness, or duty towards family?) Interestingly, in New Game++ we get references in the journal to Junko giving birth. Nowhere else in the game does Hinako mention this. There are no references to a nephew or niece. Is this because Junko lost the child, perhaps dying in childbirth? Or did Hinako shun this new member of the family as being the product of her sister’s transformation into a faceless and weak bride?
She feels much the same way about her mother, seeing her as weak for not standing up to her father. She also resents her for pushing her daughter into girly things and marriage. She sees her father as a dangerous, cold, and volatile alcoholic. In the path for Ending #4, Hinako finally sees her parents and sister as they are… human, flawed, victims in their own right. She sees her mother’s quiet strength, her sister’s longing for a different life, and her father’s deep heartbreak and imprisoning pride. She doesn’t necessarily forgive them, but she hears them out, accepts them for who they are, and acknowledges that they’re her blood regardless of how she feels about them. This gives her the strength to break the arranged marriage, fight the god’s control over her, accept the darker side within her, and choose her own path, finally.
Pun totally intended. (Credit: NeoBards Entertainment, Konami)
Any analysis of a Silent Hill game would be incomplete without taking a look at how it fits in to the series as a whole. One of the questions everyone had when the setting and time period of this game was first announced was: how is this even a Silent Hill game? It doesn’t take place in Silent Hill! I feel like this is more Silent Hill as a state of being than a location. If you recall, Silent Hill 3 showed the corruption of the town reaching beyond to a different town to ensnare Heather. This game has many themes in common with the other games in the series— mental and emotional trauma, symbolic monsters and environment, a sort of purgatory state where the main character wanders around finding secrets of the past and uncovering the mystery of what’s happening.
Personally, I feel like Silent Hill— the curse, the evil— has migrated. Maybe it started here with the Inari faith or with the death of the Yamata-no-Orochi. Or maybe it goes back further. I do feel a direct tie is in Silent Hill: The Short Message. (Which also had a non-American setting.) A Japanese witch moved to the small German town of Kettenstadt and cursed the town with bad fortune after she was attacked. This took place in the 30s and it was not told where she came from… so it could have been Ebisugaoka. Maya— also Japanese— could be related to Hinako in some way. Since this game took place in the 60s, Maya could even be her granddaughter. Of course, this is just grasping at straws. Nothing definitive links the two games despite both being a part of the franchise.
The biggest connection is in the Agura no Hotei-sama. This, to me, seems to be the Aglaophotis from Silent Hill 1 and 3— the red liquid said to dispel demonic forces and protect one from supernatural forces. In the path to Ending 3, when Light Hinako enters the sacred chamber, she is treated by both Junko and Fox Mask as an intruder, a malevolent entity that does not belong there. Dark Hinako took the elixir to dispel her possession and trigger the entity entering into Shu in Ending 2. It was pretty similar to what happened at the end of Part 1. (And to a lesser extent, the end of Part 3.)
This is pretty. (Credit: NeoBards Entertainment, Konami)
So I think that pretty much brings us to the end of our long discussion of Silent Hill f. I hope you all see now why I chose to make this a two part series. There’s no way I could have been this thorough in time for my traditional Halloween post.
I really enjoyed this game and it makes me even more excited for Silent Hill’s new renaissance. Each Silent Hill game gives a new experience, new gameplay, and a deep story with multiple endings and a lot of lore. I think the team did an amazing job with Hinako’s story and the branching paths and multiple endings of Silent Hill f were well worth playing through multiple times to uncover. Hinako’s journey will stay with me for the rest of my life, and I hope you appreciated my analysis of the events of the game.
And one final thought that I couldn’t fit in anywhere else. For some reason in each cut scene, it reverted Hinako back to carrying the original steel pipe she grabs as her first weapon. I’m not sure why they went this route, as clearly they could adjust her costume and texture easily enough, adding in tears and wounds. But it became a running joke between me and Cocoa as I played. We called it the “cut scene pipe”. On my last play through as Hinako was breaking apart the altar, I said, “It’s more powerful than the unpurified Sacred Sword… it’s the cut scene pipe!“
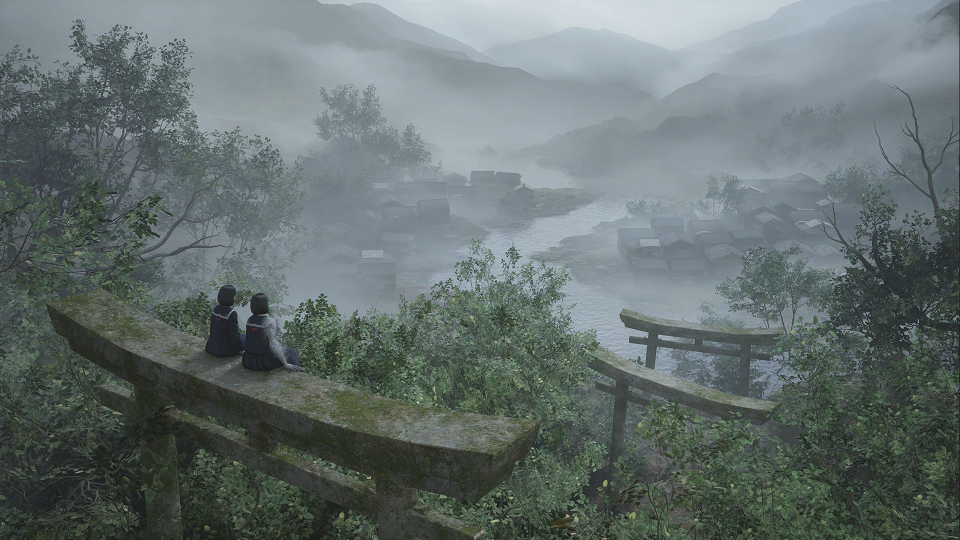
This does look peaceful. (Credit: NeoBards Entertainment, Konami)
Thank you for joining me once again as I went through the rest of Hinako’s story. I had so much fun playing through this game over and over and breaking it down. If your analysis of the story differed from mine, that’s fine… as I’ve said, it’s all open to interpretation. I did the best I could with the information I uncovered.
I hope you all enjoyed the posts as well. There are a lot of good posts scheduled for this year, and of course I’ll be back again on Halloween for my annual Silent Hill post, where I (FINALLY) play Silent Hill Origins! (Unless Townfall comes out by then… which it very well might.) Either way, I’ll see you then.
And now, to rehash my running joke from the Part 1, the “F” now stands for FINISHED!
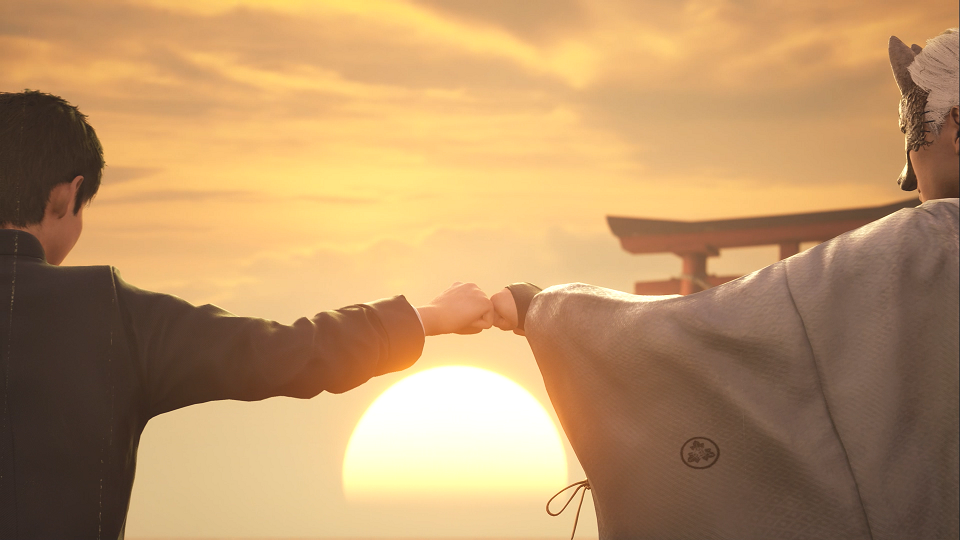
Fist bump. (Credit: NeoBards Entertainment, Konami)